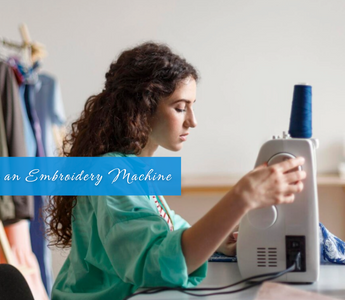
If you have ever looked at a shirt with a neat logo or a personalized towel with fancy lettering and wondered how it got there, the answer is often an embroidery machine.
These machines might look like regular sewing machines at first, but they work in very different ways. Instead of just sewing two pieces of fabric together, embroidery machines turn digital designs into accurate stitches, making fabric into art.
Understanding how embroidery machines work helps you see why they are so powerful for both everyday crafting and professional businesses. Let’s break it down step by step.
Quick Takeaways 🧶:
- Embroidery machines read a digitized stitch file and move a hooped fabric on the X-Y plane while the needle forms stitches vertically.
- A bobbin and hook lock the top thread into fabric, so correct bobbin setup and tension are key to clean results.
- Stabilizers keep fabric from stretching or puckering. Choose tear-away, cut-away, or wash-away based on fabric and design.
- Single-needle machines suit hobbies, multi-needle machines add auto color changes and speed for small businesses.
What Is an Embroidery Machine?
An embroidery machine is a computerized machine that stitches designs onto fabric automatically. Unlike a sewing machine, which is mainly used for construction like hems or seams, an embroidery machine is used for decoration.
Key features of embroidery machines:
- Computerized controls that read digital pattern files.
- Ability to stitch names, logos, and decorative borders.
- Hoops and stabilizers that hold fabric tightly in place.
- Precision stitching that always produces a neat result.
If you think of a sewing machine as building clothes, then embroidery machines decorate them.
Read More 🔎: What is Embroidery? Everything You Need to Know
How Do Embroidery Machines Work? Step by Step

Embroidery machines operate by using a motorized pantograph to move the hooped fabric precisely under a high-speed needle.
After the fabric is secured in the hoop, a digital design is uploaded to the machine’s computer.
The pantograph then shifts the fabric according to the programmed instructions, while the needle stitches the design with thread to accurately recreate the digital pattern.
Step 1: Loading the Design
The process begins with a digital file. Every embroidery machine can read special formats like PES, DST, JEF, or EXP. The design tells the machine where to stitch, how long each stitch should be, and in what order.
- Many machines come with built-in designs.
- You can download designs online or buy them from embroidery shops.
- Some machines connect to computers by USB, Wi-Fi, or even phone apps.
- Advanced users can create custom artwork using digitizing software.
Without this design, the machine would not know what to stitch.
Step 2: Hooping the Fabric
This part makes a huge difference in stitch quality. The fabric is placed inside an embroidery hoop along with a stabilizer. The stabilizer is a sheet placed under or over the fabric that keeps it from stretching or moving.
- The top hoop sits above the fabric.
- The bottom hoop is held in place from underneath the fabric.
- Both hoops lock together, keeping the fabric tight.
If the fabric is not hooped correctly, your design may appear crooked or wrinkled.
You May Want to Shop 🛒


Step 3: Threading the Machine
Embroidery machines use the same needle and bobbin system as sewing machines but in a more controlled way. The top thread passes through the needle, while the bobbin thread is placed underneath.
Things to get right in threading:
- Correct type of embroidery thread, such as rayon or polyester.
- Tension settings that balance top and bottom threads.
- Proper needle type depending on the fabric being stitched.
If the thread breaks often, it usually means that the threading or tension needs adjustment.
Step 4: Starting the Stitching Process
Once the design is chosen, the fabric is hooped, and the machine is threaded, the fun begins.
- The machine arm moves the hoop in different directions under the needle.
- The needle goes up and down, making tiny stitches exactly where the design tells it to.
- The computer inside the machine remembers which color corresponds to each position and stops when the thread needs to be changed.
- Some machines even switch threads automatically if they have multiple needles.
This is where embroidery feels like magic. All you do is press start, and the machine creates the design on its own.
Step 5: Finishing Touches
When the stitching is done, you unhoop the fabric and trim away any extra stabilizer. Loose thread tails are cut away with small scissors. Sometimes, little connecting “jump stitches” between letters need to be trimmed too.
If you used a water-soluble stabilizer for tricky fabrics, you can rinse it out. After trimming and pressing, the fabric is ready to be shown off.
Key Parts of an Embroidery Machine

To understand how embroidery machines work, it helps to know the main parts:
- Needle and Bobbin: The needle pulls the top thread, while the bobbin provides the bottom thread. They meet to form stitches.
- Hoop and Stabilizer: Keep fabric tight so stitches land in the right place.
- Embroidery Arm: Moves the hoop precisely as the needle goes up and down.
- Motor: Controls speed and power for stitching.
- On-Screen Display: Lets you pick, size, and rotate designs.
- Thread Tension System: Prevents loops and knots by keeping the thread even.
Each part plays a role in making sure the design comes out professional every time.
🧶Also Read: 15+ Essential Embroidery Tools for Beginners & Experts
Different Types of Embroidery Machines
Not all embroidery machines are the same. They come in various types, depending on your specific needs.
-
Single-Needle Machine
- Good for beginners and hobby use.
- Only one needle, so you switch colors manually.
- Works well for small projects and learning the basics.
-
Multi-Needle Machine
- Has 4 to 12 needles, each pre-threaded with a different color.
- Switches colors automatically which saves time.
- Commonly used in embroidery businesses.
-
Combination Sewing and Embroidery Machine
- Acts as both a sewing machine and embroidery machine.
- Great for crafters who want versatility but have limited space.
-
Commercial Embroidery Machine
- Designed for big businesses to produce items in bulk.
- Fast stitching speed and large hoop sizes.
- Handles heavy fabrics like jackets and hats.
What Makes Embroidery Machines Accurate?
Embroidery machines are significantly more precise than hand stitching due to their software and motor control.
- Digitizing Software: Turns images into stitch maps. Every line, curve, and fill area is broken down into stitches.
- Computer Precision: Motors move the hoop precisely to the exact location of each stitch.
-
Stitch Types:
- Running stitch for outlines and detail.
- Satin stitch for text or shiny lines.
- Fill stitch for solid covered areas.
The blend of software and mechanics ensures every project looks consistent.
Benefits of Using Embroidery Machines
Why do people love using embroidery machines? Because they offer many rewards:
- Time-Saving: A machine can complete a design in ten minutes that might take hours to do by hand.
- Consistency: Every stitch looks even and neat.
- Creativity: Add names, initials, or custom logos to everyday items.
- Professional Quality: Even small home machines create results that look store-bought.
- Scalability: Perfect for starting a small embroidery business.
Conclusion
Embroidery machines work by combining digital designs, precise movement, and careful stitching to turn plain fabric into art.
From loading the design to hooping, threading, stitching, and finishing, each step works together like a smart system.
Whether you are crafting at home or running a business, embroidery machines save time, produce professional-looking results, and open up countless creative possibilities.
If you are ready to explore embroidery for yourself, check out these supplies and start creating today:
FAQs About How Embroidery Machines Work
Do you need a computer for an embroidery machine?
Not always. Many machines can stitch built-in designs or read files from a USB drive or Wi-Fi. You only need a computer if you want to create, edit, or convert custom designs. Software on a computer lets you change size, lettering, density, and file formats.
Does an embroidery machine do all the work?
It does the stitching, but you still prepare each step. You must choose a stabilizer, hoop the fabric, thread the machine, and change colors when prompted. You also trim jump stitches and check tension. Good results come from proper setup and testing on scrap.
How does a commercial embroidery machine work?
A commercial unit uses multiple needles and high speed motors to stitch designs loaded through its control panel. The fabric is hooped, then the machine moves the hoop in X and Y to follow the stitch path. It can auto trim threads, change needles for new colors, and run faster for large orders. Operators still manage hooping, tension, and quality checks.
Is there a difference between a sewing machine and an embroidery machine?
Yes. A sewing machine makes straight and zigzag seams by feeding fabric forward for construction. An embroidery machine holds fabric in a hoop and moves it under the needle to sew designs, logos, and monograms. Some combo models can do both, but they switch modes and use different settings and accessories.


