Whether you are just starting embroidery or want to improve your skills, having the right embroidery tools is key.
The right tools help you create cleaner stitches, save time, and enjoy the process more. These tools include needles, hoops, threads, scissors, and other accessories that support your work.
Choosing the right needles and thread types significantly impacts how your design appears and feels on fabric. Hoops keep your fabric tight, making it easier to stitch with accuracy.
Knowing which tools to use and how to use them will help you get better results no matter what kind of embroidery you do.
Quick Summary ⚡:
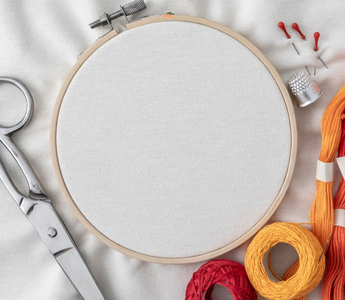
- 🧵 Must-have embroidery tools: needles, hoops, scissors
- ✨ Optional tools: thread organizers, transfer pens, thimbles
- 📦 Start with a beginner embroidery kit or build your own
- 🪡 Best thread types: cotton, silk, and metallic
- ✅ Tool quality matters—invest in sharp scissors and good hoops
5 Essential Embroidery Tools Every Stitcher Needs
To start embroidery, you need a few key tools. These help you hold your fabric, make neat stitches, cut threads cleanly, and work with the right materials. Choosing good tools saves time and improves your embroidery quality.
1. Embroidery Needles
Embroidery needles come in many sizes and types, like crewel, tapestry, and chenille. The size matters because it should fit both your thread and fabric.
A small needle works well with fine thread and thin fabric. A larger needle is better suited for thick threads or loosely woven fabrics.
When selecting needles, look for sharp points if your fabric is particularly tight. Blunter needles suit loose weaves to avoid snagging. Keep a variety of needles in your kit so you can switch them as needed.
2. Embroidery Hoops
Embroidery hoops hold your fabric tight while you stitch. They are mainly made of wood or plastic. Wood hoops give a classic feel and are sturdy, but slightly heavier. Plastic hoops are lighter and easier to clean.

Choose your hoop size by the project. Small ones suit tiny designs, while bigger hoops are good for large areas.
When using a hoop, tighten the screw enough to keep the fabric flat, but not so tight that it warps. Stretch the fabric evenly to avoid puckering.
🧵 Check Out:
- 🪡 Caydo 5 Inch Wooden Round Embroidery Hoop
- 🪡 Caydo 8 Inch Wooden Round Embroidery Hoop
- 🪡 Caydo 3 Inch Wooden Round Embroidery Hoop
3. Embroidery Scissors
Sharp scissors with pointed tips are key. They help you cut threads close to fabric without pulling or fraying.

🛒 Shop Imperial Crane Scissors Now
There are different types: snips are small and good for trimming, shears offer stronger cutting for bigger fabric parts, and thread cutters are designed to clip threads fast.
Look for scissor brands known for quality and sharpness. Keeping your scissors sharp makes embroidery easier and neater.
4. Embroidery Floss or Thread
Cotton floss is great for beginners because it’s easy to work with and comes in a variety of colors. Silk threads are smooth and shiny but can be slippery. Metallic thread adds sparkle but may be harder to handle.

🛒 Shop Caydo 36 Color Embroidery Floss Now!
Separate the floss into individual strands before you stitch. Most patterns call for using two or three strands. Store your threads in boxes or cards to stop tangles.
Choose colorfast thread to ensure your work won’t fade when washed. Eco-friendly threads are also available for those seeking a greener option.
5. Fabric for Embroidery
Common fabrics include cotton, linen, and evenweave. Cotton is soft and easy to work with, making it suitable for most projects.

🛒 Shop Caydo 12*18 Inc Aida Cloth 14 Count - 6 PCS Now!
Linen has a slightly rougher texture but gives a classic look. Evenweave fabrics have threads spaced evenly for neat stitches.
Before you start, wash and iron your fabric. This removes wrinkles and shrinks any parts that might change shape later.
Use an embroidery hoop or frame to stretch the fabric tightly so stitches are smooth and even.
Helpful Embroidery Tools to Improve Your Craft
The right tools can make a big difference in your embroidery projects. They help you stitch faster, avoid mistakes, and stay comfortable while working.
Some also keep your space neat so you can focus more on creating and less on untangling thread or finding missing supplies.
Tools That Make Threading Easier
- 6. Needle threaders help you get the thread through the tiny eye of the needle quickly. Great for slippery or fine threads, and they save a lot of time and frustration.
- 7. Thread conditioners, such as beeswax or thread gloss, coat your thread to prevent fraying and tangles. This keeps your stitching smooth and helps avoid knots.
These two tools are small but mighty. They make your stitching faster, cleaner, and a lot less stressful.
Tools for Marking and Transferring Designs
- 8. Heat-erasable pens disappear when ironed, so you don’t have to worry about leftover lines on your fabric.
- 9. Water-soluble pens and chalk pencils wash out easily after you're done.
- To transfer designs, you can use transfer paper or a lightbox for tracing onto thin fabric.
- 10. Printable stabilizers work with embroidery machines, keeping your fabric steady while showing the pattern outline.
These tools help you add detailed designs without damaging your fabric or leaving any marks behind.
Tools for Comfort and Better Visibility
Thimbles, Finger Guards, and Magnifiers
- 11. Thimbles protect your fingers and help push the needle through tough fabric.
- 12. Finger guards offer soft protection and cover more of your fingers if needed.
- 13. Magnifiers make small stitches easier to see. Some even come with built-in lights for better visibility.
These tools make long stitching sessions more comfortable and help reduce hand strain and eye fatigue.
Tools to Stay Organized
Storage Solutions for Embroidery Tools
- 14. Floss organizers keep your thread colors separated and tangle-free.
- Bobbins store your threads neatly and make it easy to switch colors.
- 15. Needle cases protect your needles and help you find the right size fast.
- Tool kits or pouches hold your scissors, needles, pens, and more in one place.
- If you move your project around, a portable storage box keeps everything safe and easy to carry.
Staying organized saves you time and helps you enjoy your embroidery even more.
🧵Also Read: Unique Embroidery Gift Ideas To Make and Share
How to Choose the Right Embroidery Tools for You
Picking the right tools depends on your skill level and the type of embroidery you want to do. Some tools help you get started easily, while others improve your control and comfort as you gain experience. Your project style and fabric also guide what tools you should use.
Building a Beginner Embroidery Kit
Begin with a basic kit that includes approximately 6 to 8 essential tools. You need:
- Embroidery needles that are easy to thread
- A small embroidery hoop to hold your fabric tightly
- Cotton embroidery thread in a few colors
- Fabric scissors for precise cutting
- A needle threader to help with threading
- A thimble to protect your finger if needed
- Fabric like plain cotton for practice
These tools are both affordable and readily available. Keep your kit simple so you can focus on learning stitches and working with your thread and fabric.
Tools for Intermediate and Advanced Embroiderers
As you improve, you want tools that give more precision and comfort. You might add:
- Gold-tipped needles, which are smoother and last longer
- Magnetic needle minders to keep your needles safe and handy
- Specialty hoops,s as square or adjustable one,s for different fabrics
- Embroidery frames or floor stands to hold your work steady
These tools help reduce hand strain, allowing you to work on larger or more detailed projects. Quality matters more at this stage.
Project-Specific Embroidery Tools
Different types of embroidery need different tools based on fabric and stitches:
- Cross-stitch usually uses even-weave fabric and a hoop, plus blunt tapestry needles
- Crewel embroidery works on linen or twill with sharp needles and larger hoops
- Stumpwork needs a raised surface, often using special frames and padding tools
Your fabric choice affects needle size and hoop type. Select tools that suit your technique and the thickness of the fabric for optimal results.
🧵Also Read: Embroidery vs. Cross Stitch
Storing and Organizing Your Embroidery Tools
Keeping your embroidery tools organized helps you find what you need quickly and keeps everything in good condition.
You can organize threads and needles in ways that save space and protect your supplies. Utilize simple storage ideas to prevent clutter and damage.
1. Floss Organization Systems
You can store embroidery floss on bobbins or in small plastic bags. Bobbins let you wrap thread neatly and keep it tangle-free. Label each bobbin with the color number to find shades quickly.
Plastic bags are ideal if you want a system that requires less time to set up. Put similar colors together in one bag and then store the bags in a box or binder. This keeps your threads clean and organized.
DIY ideas include using a binder with folder inserts to hold plastic bags or bobbins. This method keeps your floss flat and easy to flip through. You also save space by keeping everything in one place.
2. Protecting Needles & Hoops
Needles can rust if exposed to moisture. To protect them:
- Store needles in a dry place.
- Use a needle case or magnetic holder.
- Keep needles away from humidity to avoid rust.
Hoops may warp if left in humid areas or stacked incorrectly.
- Store hoops flat or hang them on hooks.
- Avoid leaving fabric in hoops long term to keep shapes even.
- Keep hoops away from heat and moisture.
Following these tips helps your tools last longer and work better when you need them.
🧵Also Read: How to Use an Embroidery Hoop
Storage Solutions for Embroidery Tools
Keeping your embroidery tools organized helps you find what you need quickly and protects your materials from damage. There are specific ways to store different types of tools, including needles and threads, that make your workspace more efficient.
Organizers and Boxes
Using dedicated organizers or boxes is one of the best ways to store embroidery needles and small tools.
You can find boxes with multiple compartments to separate needles, scissors, and other small items. This prevents tools from getting lost or tangled.
Look for organizers with clear lids so you can see the contents without having to open them. Magnetic needle holders can keep needles safe and easily accessible.
Replace needles when they become dull to maintain the best results in your work.
Carry cases are also useful if you want to transport your tools to various locations. Ensure the case has secure compartments to prevent needles and small tools from falling out.
Thread Storage Techniques
Thread storage requires a system that stops your threads from tangling. Using bobbins or floss cards to wrap your threads keeps them neat. You can place these in boxes with separate compartments or use thread organizers designed to hold multiple spools.
Some people use pegboards or tackle boxes because they can hold thread and other tools together.
Choose storage that fits your collection size — larger systems work well for big collections, while smaller boxes might be better for a few colors.
Clear containers help you spot colors quickly. Label your threads with stickers or tags for faster selection. Keeping threads stored away from direct sunlight prevents fading and damage.
Conclusion: Invest in the Right Embroidery Tools for Long-Term Success
Choosing the right tools is key to making your embroidery work easier and more precise. Quality items, such as sharp scissors, sturdy hoops, and smooth thread, help you avoid common problems like uneven stitches or fabric damage.
You don’t need to buy everything at once. Focus on tools that match your current project needs. Over time, adding reliable needles, stabilizers, and an efficient embroidery machine will enhance your skills and increase your speed.
Investing in these tools saves time and helps you avoid frustration. They also contribute to better results, making you more confident in your work.
Remember, tools are not just equipment but the foundation of your craft. Taking time to select the right ones will support your embroidery goals now and in the future.
Check Out:
|
|
Computerized Smart Embroidery Machine CE01
|

❓FAQs About Embroidery Tools
To start embroidery, you will need specific tools, including needles, thread, and hoops. Knowing which needle to pick and whether embroidery floss differs from sewing thread will help you get better results. Also, understanding the potential of hand embroidery as a business can guide your plans.
What are the basic tools in embroidery?
You need an embroidery hoop to hold the fabric tightly. Embroidery needles are essential for smooth stitching. Embroidery floss or thread, scissors, and a fabric marker are also necessary.
Is the hand embroidery business profitable?
Hand embroidery can be profitable if you find the right market. Custom designs and high-quality work increase value. Profit depends on your skill, pricing, and how well you market your products.
What tool is used for hand embroidery?
The main tool for hand embroidery is the embroidery needle. You also use an embroidery hoop to keep fabric steady. Other tools include thread, scissors, and sometimes a thimble.
What kind of needle should I use for embroidery?
Use needles labeled “embroidery” or “crewel” needles. They have a sharp point and a longer eye to hold embroidery floss easily. The size depends on your fabric and thread thickness.
Is embroidery floss the same as sewing thread?
No, embroidery floss is thicker and made of multiple strands, which you can separate. Sewing thread is thinner and stronger, designed to sew fabric pieces together, not for decorative stitching.


