
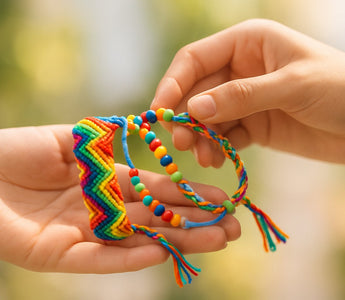
Wenn du Armbänder für deine besten Freunde basteln möchtest, wirst du jede Menge Spaß haben! Diese farbenfrohen Armbänder sind einfach zu basteln und die perfekte Möglichkeit, deinen Freunden zu zeigen, wie viel sie dir bedeuten.
Mit nur wenigen einfachen Materialien wie Schnur oder Stickgarn können Sie ein besonderes Geschenk herstellen, das Ihre beste Freundin in Ehren halten wird. Außerdem können Sie Ihre Lieblingsfarben und -muster auswählen!
Möchten Sie lernen, wie Sie anfangen und coole Designs sehen? Lesen Sie weiter, um einfache Schritte und tolle Ideen für die Herstellung von Armbändern für beste Freunde zu erfahren!
Warum Armbänder für beste Freunde herstellen?
Armbänder für beste Freunde lassen sich leicht herstellen und haben für Menschen jeden Alters eine wichtige Bedeutung.
Das Herstellen und Teilen dieser Armbänder ist eine Tradition, die seit Generationen besteht, da sie eine besondere Verbindung zwischen zwei Menschen darstellt.
Bedeutung hinter Freundschaftsarmbändern
Freundschaftsbänder sind viel mehr als nur bunte Accessoires. Sie machen sie, um jemandem zu zeigen, wie viel er Ihnen bedeutet.
Das Verschenken eines Armbandes steht oft für Vertrauen, Loyalität und Unterstützung. Wenn Sie Ihrem Freund ein Armband um das Handgelenk binden, ist es wie ein kleines Versprechen, immer für ihn da zu sein.
Manche glauben, dass ihr Wunsch in Erfüllung geht, wenn sie das Armband tragen, bis es von selbst abfällt.
Schlüsselbedeutungen:
- Vertrauen und Verständnis
- Unterstützung in schweren Zeiten
- Feier wichtiger Momente
Viele Menschen bewahren die Armbänder ihrer besten Freunde jahrelang auf und betrachten sie als Erinnerung an besondere Zeiten und gemeinsame Erinnerungen.
Jeder Knoten und jede Farbe kann eine einzigartige Bedeutung haben, beispielsweise Rosa für Freundlichkeit oder Grün für Wachstum.
Warum sie als Geschenk und zur Bindung beliebt sind
Armbänder für die beste Freundin sind ein beliebtes Geschenk, weil sie persönlich und handgefertigt sind.
Sie können Farben und Muster auswählen, die dem Geschmack Ihres Freundes entsprechen, oder Farben verwenden, die Ihnen beiden etwas bedeuten. Diese Armbänder eignen sich hervorragend für Geburtstage, Schulabschlüsse oder einfach, um zu zeigen, dass Sie sich um ihn kümmern.
Das gemeinsame Erstellen macht außerdem Spaß. Während der Arbeit haben Sie Zeit zum Reden, Lachen und Erzählen von Geschichten.
Gründe für ihre Popularität:
- Handgemachte Berührung zeigt Mühe
- Einfach anzupassen
- Erschwinglich
- Unterstützt die Kreativität
Durch das Tragen passender oder ähnlicher Armbänder ist Ihre Freundschaft für alle sichtbar.
Manche Menschen sammeln sogar mehrere Armbänder, wenn ihr Freundeskreis wächst. Diese Tradition überwindet Kulturen und Zeitalter und ist eine einfache, aber dauerhafte Möglichkeit, seinen Freunden zu zeigen, dass man sie schätzt.
Was Sie brauchen, um Armbänder für beste Freunde herzustellen

Um Armbänder für beste Freunde herzustellen, benötigen Sie die richtigen Materialien und Werkzeuge, um den gewünschten Stil und die gewünschte Haltbarkeit zu erzielen.
Viele Optionen sind in lokalen Kunsthandwerksläden oder online leicht zu finden, sodass der Einstieg einfach und kostengünstig ist.
Wichtige Materialien (Faden, Perlen, Werkzeuge)
Das Hauptmaterial für klassische Freundschaftsbänder ist Stickgarn oder Stickgarn . Diese Fäden gibt es in allen Farben des Regenbogens, sie sind weich, aber stark und bilden Knoten, die gut halten.
Für dehnbare Perlenarmbänder benötigen Sie eine elastische Kordel , mit der Sie das Armband an- und ausziehen können.
Sie können Perlen für zusätzliche Farbe hinzufügen oder Namen und Nachrichten buchstabieren. Wählen Sie aus Glas-, Kunststoff- oder Holzperlen in allen möglichen Formen und Größen.
Um Fäden oder Gummibänder sauber abzuschneiden, benötigen Sie eine Sicherheitsschere. Manche Leute verwenden Klebeband oder Klemmbretter, um die Stränge beim Knotenbinden an Ort und Stelle zu halten.
Hier ist eine kurze Versorgungstabelle:
|
Liefern |
Zweck |
|
Stickgarn |
Knoten knüpfen, Muster erstellen |
|
Elastische Kordel |
Perlen auffädeln für dehnbare Armbänder |
|
Perlen |
Dekoration, Personalisierung |
|
Schere |
Faden oder Kordel abschneiden |
|
Band/Zwischenablage |
Halten Sie das Armband während der Arbeit ruhig |
Wo Sie Bausätze kaufen oder günstige Materialien finden

Caydo Vollautomatisches elektrisches Perlenspinner-Kit
Freundschaftsarmband-Sets und Zubehör finden Sie bei vielen Einzelhändlern:
-
Bastelläden wie Michaels, Hobby Lobby und JoAnn Fabrics führen komplette Sets mit Garn, Perlen, Gummiband und Musteranleitungen – perfekt für Anfänger.
- Online-Marktplätze wie Amazon und Etsy bieten eine große Auswahl an Sets und Materialien, darunter Ponyperlen, Buchstabenperlen und Themenanhänger.
Wenn Sie jedoch nach einem One-Stop-Shopping-Angebot suchen , ist Caydo Ihre beste Wahl:
-
Caydo bietet eine umfangreiche Auswahl an Bastelutensilien – von Stickgarn und Perlen bis hin zu Perlenspinner-Sets und Werkzeugen – alles an einem Ort.
-
Ihre Bead Spinner Kits ( manuell und elektrisch ) vereinfachen die Perlenarbeit – ideal, um schnell und sauber Perlenakzente hinzuzufügen.
-
Egal, ob Sie einfache Fäden, Anhänger oder sogar Pfeifenreiniger möchten, Caydo hat alles, sodass Sie Ihre Ausrüstung zur Armbandherstellung ganz einfach aufrüsten können, ohne zwischen Geschäften hin- und herlaufen zu müssen.
Einfache Armbandmuster für den Anfang
Freundschaftsbänder können einfach oder detailliert gestaltet sein. Wenn Sie mit ein paar klassischen Mustern beginnen, lernen Sie die Grundlagen des Knotens und der Farbgebung. Für die meisten Muster wird Stickgarn verwendet, und Sie benötigen nur wenige Materialien.
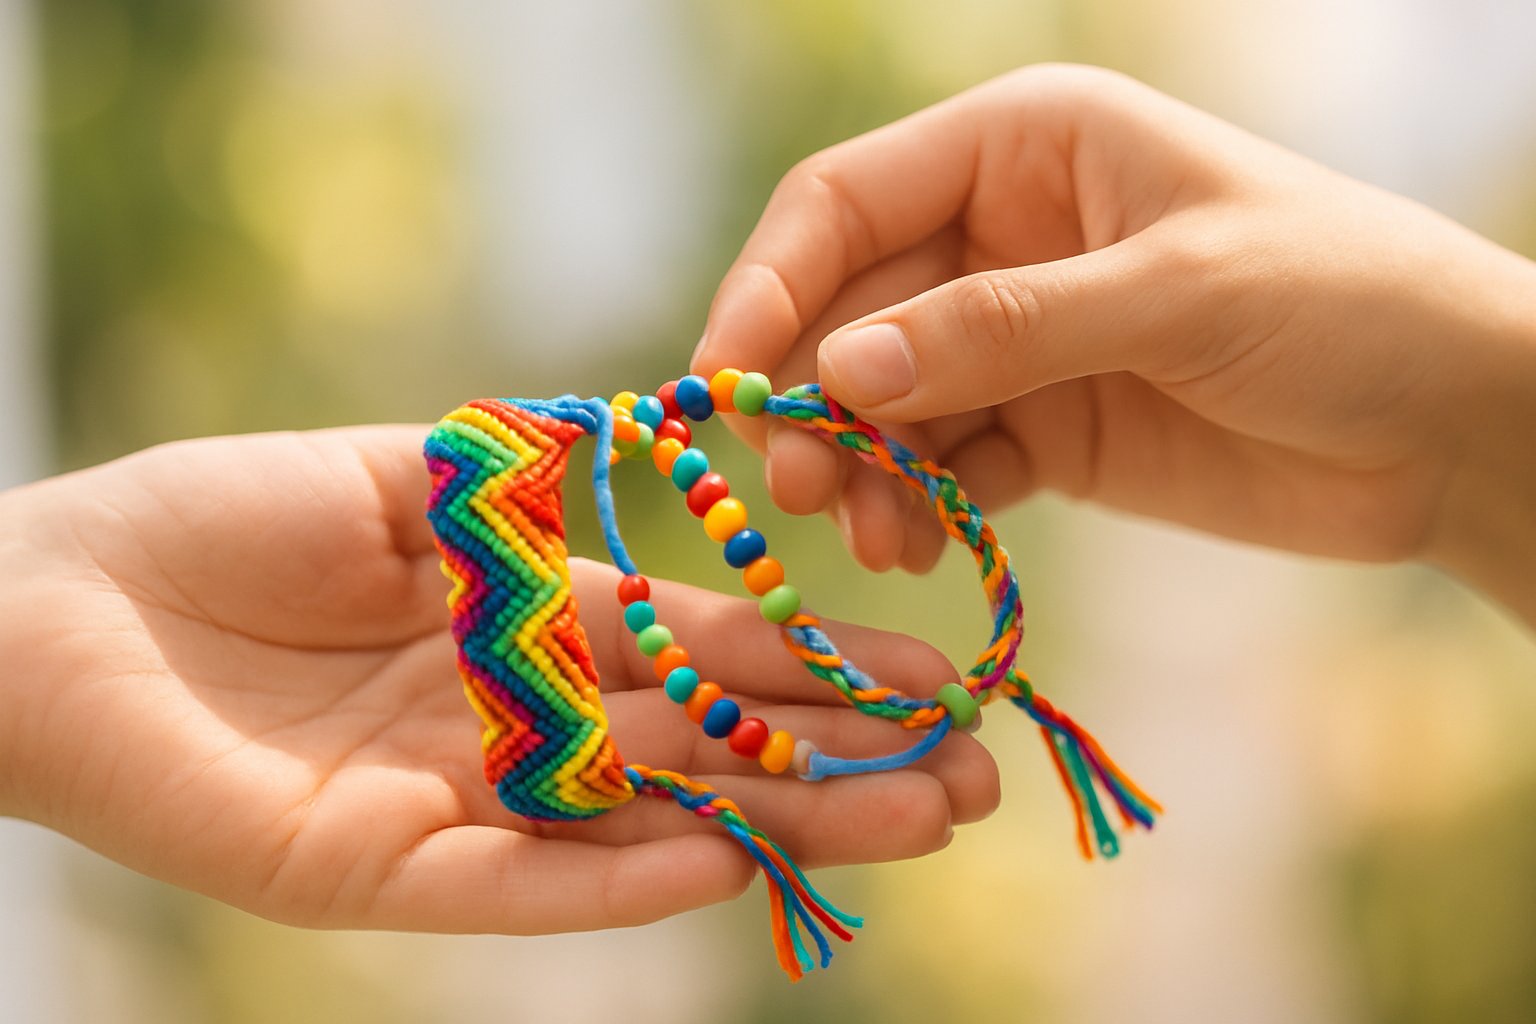
Candy Stripe-, Chevron- und Herz-Stile
Das Candy-Stripe-Muster ist besonders bei Anfängern beliebt. Es verwendet nur den Vorwärtsknoten. Man wählt zwei oder mehr Farben und legt die Fäden nebeneinander.
Candy Stripe-Muster (Favorit für Anfänger)
- Der einfachste Start: nur Vorwärtsknoten.
- Legen Sie zwei oder mehr farbige Fäden nebeneinander.
- Binden Sie immer von links nach rechts, um saubere diagonale Streifen zu erzeugen.
- Schnell, einfach und zufriedenstellend abzuschließen.
Chevron-Muster (Streifen der nächsten Stufe)
- Eine elegante Weiterentwicklung von Candy Stripe.
- Sie knoten von beiden Kanten nach innen und bilden so V-förmige Reihen.
- Erfordert Vorwärts- und Rückwärtsknoten.
- Verwenden Sie mehrere Farben für kräftige, auffällige Designs.
- Dieses klassische Chevron-Muster ist eines der beliebtesten Muster für Freundschaftsarmbänder.
Herz-Freundschaftsarmband
- Eine charmante Variante des Chevrons.
- Durch Farb- und Knotenänderungen entstehen Miniherzen.
- Beinhaltet sowohl Vorwärts- als auch Rückwärtsknoten.
- Es erfordert ein wenig Übung, aber es ist unglaublich lohnend, das erste Herz zu sehen.
Muster für Anfänger und einfache Upgrades
Wenn Sie gerade erst anfangen, gibt es sogar noch einfachere Möglichkeiten.
3-Strang-Zopf (super einfacher Anfang)
- Verwendet nur drei Fäden – perfekt, um das saubere Handhaben und Binden zu üben.
- Schnell zu beenden, ideal für absolute Anfänger.
Armband mit diagonalen Streifen (auffällig und einfach)
-
Verleiht mit einfachen Vorwärtsknoten und Farbwechseln Flair.
-
Erstellen Sie mit minimalem Aufwand auffällige Streifen – es sind nur Vorwärtsknoten erforderlich.
Wellenmuster-Armband (Anfänger + Flair)
- Kombiniert Vorwärts-/Rückwärtsknoten und Farbverschiebungen, um eine Wellenlinie über das Armband zu erzeugen.
- Eine lustige, kreative Weiterentwicklung von Streifen.
Doppelhelix (Seil-Upgrade)
- Zwei Fäden winden sich spiralförmig umeinander und imitieren so ein gedrehtes Seil.
- Ideal, um Ihren Armbändern Struktur und Dimension zu verleihen.
Jedes dieser einfachen Muster für Freundschaftsarmbänder stärkt Ihr Selbstvertrauen für komplexere Projekte.
Durch die Herstellung einfacher, aber hübscher Armbänder können Sie Ihren persönlichen Stil zeigen und gleichzeitig lernen, Diagrammen und Mustern zu folgen.
Durch Mischen von Farben oder Ändern der Reihenfolge der Fäden können Sie bei jedem Beginn eines neuen Armbands neue, einzigartige Looks kreieren.
Schritt-für-Schritt-Anleitung zum Herstellen von Armbändern für beste Freunde

Bevor Sie mit der Herstellung Ihrer eigenen Armbänder für beste Freunde beginnen, legen Sie Ihre Materialien bereit und lernen Sie einige einfache Knotentechniken.
Jeder Schritt zählt, von der Auswahl der richtigen Schnur bis zum Anbinden des letzten Knotens oder der besonderen Perle.
1. Bereiten Sie Ihren Thread und Arbeitsbereich vor
Wählen Sie Stickgarn oder eine andere glatte, bunte Schnur für Ihr Armband. Stickgarn ist beliebt, weil es stark ist, sich leicht flechten lässt und in fast jeder gewünschten Farbe erhältlich ist.
Damit Ihr Armband auffällt, benötigen Sie zwei oder mehr Farben. Schneiden Sie die Schnüre auf jeweils etwa 60–90 cm Länge zu.
Verwenden Sie mindestens vier Stränge für ein einfaches Armband oder mehr, wenn Sie ein breiteres oder detaillierteres Design wünschen. Kleben Sie die oberen Enden auf einen stabilen Tisch oder klemmen Sie sie an ein Klemmbrett, um sie an Ort und Stelle zu halten.
Ordnen Sie die Fäden so, dass sie sich nicht verheddern. Legen Sie die Stränge nebeneinander in der Reihenfolge aus, in der die Farben im endgültigen Muster erscheinen sollen. Stellen Sie sicher, dass Ihr Arbeitsplatz sauber, hell und bequem zum Knoten ist.
2. Lernen Sie grundlegende Knoten und folgen Sie einem Muster
Freundschaftsbänder werden durch das Binden verschiedener Knotenarten in einem Muster hergestellt. Der Vorwärtsknoten und der Rückwärtsknoten sind zwei grundlegende Knoten, die Sie kennen sollten.
Der Vorwärtsknoten bewegt sich von links nach rechts und der Rückwärtsknoten von rechts nach links. Es gibt noch weitere Knoten, die Sie verwenden können:
- Vorwärts-Rückwärts-Knoten : Bewegt den Faden von links nach rechts und dann wieder zurück.
- Rückwärts-Vorwärts-Knoten : Beginnt von rechts nach links und geht dann von links nach rechts.
- Quadratischer Knoten : Gut für verschiebbare oder verstellbare Armbänder.
Wählen Sie ein einfaches Streifenmuster, wenn Sie gerade erst anfangen, oder versuchen Sie es mit einem Chevron- oder Rautenmuster, wenn Sie eine größere Herausforderung suchen.
Folgen Sie einem Armband-Tutorial, um Ihre Knoten Reihe für Reihe zu knüpfen und dabei eine gleichmäßige Spannung aufrechtzuerhalten, damit das Armband ordentlich aussieht.
Halten Sie Ihre Knoten fest, aber nicht zu fest, sonst verziehen Sie das Design. Verwenden Sie ein Muster oder erstellen Sie Ihr eigenes, indem Sie die Farbreihenfolge und Knotenarten ändern.
3. Fertigstellen, abbinden und persönliche Akzente setzen
Wenn Sie die richtige Länge für Ihr Handgelenk erreicht haben, binden Sie das Ende Ihres Armbands mit einem festen Knoten fest. Mit einem Armband mit Schiebeknoten können Sie die Größe anpassen: Verwenden Sie verschiebbare Kreuzknoten, damit Sie das Armband an- und ausziehen können, ohne es zu zerschneiden.
Schneiden Sie überschüssige Schnur ab, aber lassen Sie genug übrig, um das Armband sicher zu binden. Sie können die Enden flechten, Perlen oder Anhänger hinzufügen oder einen einfachen Überhandknoten machen.
Durch die persönliche Note wird jedes Armband für Sie und Ihre Freundin einzigartig und besonders. Achten Sie darauf, dass das Armband bequem sitzt.
Wenn Sie es einem Freund schenken, können Sie Ihre Initialen oder ein kleines Symbol in das Muster einfügen, um ein besonders aufmerksames Geschenk zu erhalten.
Personalisieren Sie Ihr Armband
Armbänder für beste Freunde werden noch bedeutungsvoller, wenn du sie individuell gestaltest. Persönliche Akzente wie Farbwahl und besondere Details unterstreichen eure einzigartige Verbundenheit und lassen die Armbänder hervorstechen.
Wählen Sie Farben mit Bedeutung
Wählen Sie zunächst Farben aus, die zum Stil Ihres Freundes passen oder eine besondere Bedeutung haben. Sie können beispielsweise die Lieblingsfarbe Ihres Freundes oder Farben verwenden, die Schulmannschaften oder Geburtssteine repräsentieren.
Manche Freunde wählen sogar Farben, die Eigenschaften symbolisieren, wie Grün für Glück oder Blau für Vertrauen.
Mit Perlenarmbändern können Sie verschiedenfarbige Perlen verwenden, um lustige Muster zu erstellen oder sogar einen Regenbogeneffekt zu erzielen.
Für geflochtene Freundschaftsbänder können Sie Fäden in Farbtönen mischen, die Sie an gemeinsame Erinnerungen erinnern. Ein Farbcode oder eine einfache Liste zur Planung Ihres Farbmusters kann hilfreich sein:
|
Farbe |
Bedeutung |
Beispielverwendung |
|
Gelb |
Glück |
Sonnenförmiger Charm-Akzent |
|
Lila |
Kreativität |
Abwechselnde Perlenstreifen |
|
Rot |
Liebe/Freundschaft |
Herzperlen oder Knoten |
Denken Sie bei der Auswahl der Farben an die Lieblingssachen, Hobbys oder sogar Insiderwitze Ihres Freundes.
Fügen Sie Namen, Buchstaben oder Anhänger hinzu
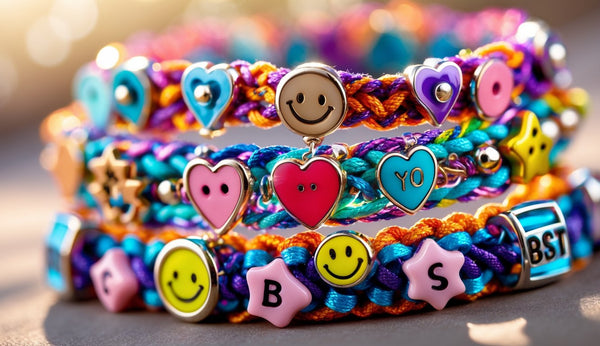
Wenn Sie möchten, dass Ihr Armband eine besonders persönliche Note erhält, fügen Sie Namen, Wörter oder einfach nur ein paar Buchstaben hinzu. Mit Buchstabenperlen können Sie ganz einfach einen Namen, ein Wort oder sogar einen kleinen Insiderwitz buchstabieren, den nur Sie beide verstehen.
Manche Leute verwenden Initialen, um eine subtile Stimmung zu erzeugen, während andere vollständige Spitznamen ausschreiben. Es hängt wirklich davon ab, was sich für Ihre Freundschaft richtig anfühlt.
Anhänger sind eine weitere tolle Möglichkeit, es zu Ihrem zu machen. Es gibt so viele davon – kleine Medaillons, Herzen, Sterne oder Formen, die zu den Hobbys Ihres Freundes passen, wie Musiknoten oder kleine Tiere.
Auch individuell gravierte Anhänger sind eine nette Geste. Sie können ein Datum, eine kurze Nachricht oder Ihre Initialen hinzufügen, wenn Sie es ausgefallener mögen.
Durch das Mischen von Materialien bleibt die Sache interessant. Versuchen Sie, Anhänger oder Buchstabenperlen sowohl auf geflochtene als auch auf Perlenarmbänder aufzufädeln.
Manchmal füge ich gerne einen Geburtsstein oder ein kleines Symbol hinzu, das nur für uns eine Bedeutung hat. Durch die Kombination dieser Ideen fühlt sich das Armband so an, als könnte es niemand anderem gehören.
Häufige Fehler und wie man sie behebt
Das Anfertigen von Freundschaftsbändern erfordert definitiv etwas Übung. Schon nach einigen Versuchen kann es passieren, dass Knoten entstehen, die komisch aussehen, oder Fäden, die einfach nicht funktionieren.
Wenn Sie Fehler frühzeitig erkennen und sofort beheben, sparen Sie viel Zeit. Außerdem sieht Ihr Armband am Ende viel ordentlicher aus.
Verwickelter Faden, lose Knoten, ungleichmäßige Spannung
Fäden verheddern sich schnell, besonders wenn Sie mit vielen Farben jonglieren. Das verlangsamt Ihren Arbeitsablauf und hinterlässt manchmal Knoten an den falschen Stellen.
Halten Sie Ihre Fäden gerade, indem Sie ab und zu mit den Fingern hindurchfahren. Ich verwende gerne Klebeband oder ein Klemmbrett, um alles an Ort und Stelle zu halten.
Lose Knoten sind ein klassisches Anfängerproblem. Wenn Sie die Knoten nicht fest genug ziehen, kann Ihr Design holprig aussehen oder das Muster verschwindet einfach.
Ziehen Sie jeden Knoten fest, aber ziehen Sie nicht so stark, dass der Faden reißt. Mit etwas Übung bekommen Sie ein Gefühl für den optimalen Punkt.
Ungleichmäßige Spannung kann das Aussehen ebenfalls beeinträchtigen. Wenn einige Knoten fest und andere locker sind, kann Ihr Armband am Ende verdreht oder holprig aussehen.
Gehen Sie langsam vor und machen Sie jeden Knoten jedes Mal auf die gleiche Weise. Manche Leute messen den Druck auf jeden Knoten, aber ehrlich gesagt müssen Sie einfach Ihren eigenen Rhythmus finden.
Schnelle Lösungen ohne Neubeginn
Fehler gemacht? Kein Problem – du musst nicht immer von vorne anfangen. Wenn du einen falschen Knoten oder die falsche Farbe entdeckst, nimm einen Zahnstocher oder die stumpfe Seite einer Nadel und löse den Knoten vorsichtig.
Lassen Sie sich Zeit, damit die Fäden nicht aus der Form geraten. Wenn Ihnen nach der Hälfte der Faden ausgeht, binden Sie ein neues Stück mit einem kleinen Knoten genau dort an, wo das alte endet.
Stecken Sie den Knoten einfach nach hinten, damit er nicht zu sehen ist. Bei verdrehten oder unebenen Stellen drücken Sie die Stelle mit den Fingern oder einem weichen Tuch glatt.
Wenn ein Abschnitt locker aussieht, ziehen Sie am Faden, bis er zum Rest passt. Ein wenig Wasser kann helfen, hartnäckige Fäden in die richtige Position zu bringen.
Hier sind einige schnelle Tipps:
|
Problem |
Schnelle Lösung |
|
Verworrene Fäden |
Trennen, entwirren, mit Klebeband oder Klammern |
|
Lose oder ungleichmäßige Knoten |
Vorsichtig wieder festziehen oder die Fäden ziehen, um die Spannung anzupassen |
|
Falsche Farbe/Knoten |
Mit einer stumpfen Nadel oder einem Zahnstocher lösen |
|
Kein Faden mehr |
Mit einem kleinen, festen Knoten ergänzen und verstecken |
Geschenkideen und passende Sets
Armbänder für beste Freunde sind tolle Geschenke für viele Anlässe. Die Wahl der richtigen Farben, Stile oder eines individuellen Anhängers zeigt, wie gut man jemanden kennt.
Geburtstagsgeschenke
Ein Armbandset für die beste Freundin zum Geburtstag zu verschenken, ist einfach etwas Besonderes. Wählen Sie ein Design oder einen Anhänger, der zur Stimmung oder den Lieblingsfarben Ihrer Freundin passt.
Eine individuelle Gravur, wie Initialen oder ein Datum, verleiht dem Geschenk eine besondere Bedeutung. Herzhälften oder zusammenpassende Puzzleteile kommen immer gut an.
Wenn Sie das Armband in einer kleinen Schachtel oder einem Beutel verpacken, macht das Auspacken noch mehr Spaß. Es sind diese kleinen Details, die ein Geschenk unvergesslich machen.
Passende Freundessets
Passende Sets sind ein Klassiker – jeder Freund bekommt ein Stück aus dem gleichen Set. Sie können sich für Perlenarmbänder mit Namen, bunte Fäden oder einfach nur verstellbare Kordeln entscheiden.
Einige Sets enthalten „Yin- und Yang“-Anhänger oder Sonnen- und Mondsymbole, sodass beide Freunde jeweils eine Hälfte eines Paars tragen. Bei Gruppen ab drei Personen können Sie die Perlenfarben mischen, aber ein Thema beibehalten.
Urlaubsstile

Bei Feiertagsarmbändern dreht sich alles um festliche Farben und thematische Anhänger. Rot und Grün für Weihnachten, Pastellfarben für Frühling oder Ostern – Sie verstehen schon.
Schneeflocken oder kleine Glöckchen verleihen dem Ganzen eine weihnachtliche Note. Weihnachtsarmbänder eignen sich zum Wichteln oder als kleine Aufmerksamkeit für den Weihnachtsstrumpf.
Hier ist eine kurze Tabelle, falls Sie Ideen brauchen:
|
Urlaub |
Armbandfarben |
Charm -Ideen |
|
Weihnachten |
Rot, Grün |
Baum, Glocke |
|
Halloween |
Orange, Schwarz |
Kürbis, Fledermaus |
|
Valentinstag |
Rosa, Rot |
Herz, Rose |
Weitere Ideen und Tutorials
Ehrlich gesagt ist es heute einfacher denn je, neue Armbanddesigns zu finden. Auf so vielen Websites und YouTube-Kanälen gibt es Schritt-für-Schritt-Anleitungen und Video-Tutorials.
Beste Websites und YouTube-Kanäle für Muster
Websites wie A Beautiful Mess und The Spruce Crafts bieten sehr verständliche Tutorials. Sie zerlegen Muster wie diagonale Streifen, Winkel und dreisträngige Zöpfe in einfache Schritte.
Sie können sogar Musteranleitungen ausdrucken, wenn Sie eher ein Papiermensch sind. YouTube-Kanäle wie Macrame School zeigen Ihnen genau, wie Sie die Fäden halten und die Knoten binden.
Es kann einen großen Unterschied machen, wenn man anderen dabei zusieht. Ich habe kleine Tricks gelernt, nur indem ich beobachtet habe, wie sie ihre Hände bewegen.
Auch auf Blogs und Bastelseiten gibt es unzählige kostenlose Schnittmuster und visuelle Anleitungen. Egal, ob Sie schlichte Looks mögen oder etwas Wildes und Vielschichtiges ausprobieren möchten, es gibt für jeden das passende Schnittmuster.
Abschließende Gedanken
Freundschaftsarmbänder zu basteln ist eine einfache und herzliche Art, eure Freundschaft zu feiern. Du brauchst keine aufwendigen Werkzeuge – nur etwas Schnur, etwas Zeit und deine Kreativität. Es gibt so viele Muster und Farben zum Ausprobieren, dass jedes Armband einzigartig wird.
Also, schnapp dir deine Bastelutensilien und fang an zu basteln! Deine beste Freundin wird sich über das liebevolle Geschenk freuen und du wirst viel Spaß beim Basteln haben. Probiert verschiedene Designs aus und findet heraus, welche euch beiden am besten gefallen!
Weitere Designs und Inspirationen finden Sie auch in unserem Artikel: Erstellen Sie atemberaubenden Schmuck mit dem Schmuckherstellungsset von Caydo .
Häufig gestellte Fragen
Wie macht man ein Armband für die beste Freundin?
Wählen Sie zwei oder mehr Stickgarnfarben aus, die Ihnen beiden gefallen. Schneiden Sie jeden Faden auf etwa 75 cm Länge, binden Sie sie an einem Ende zusammen und kleben Sie dieses Ende auf einen Tisch.
Folgen Sie einem Muster – Chevron ist ein Klassiker – indem Sie mit jedem Strang eine Reihe von Knoten binden, bis Sie die gewünschte Länge erreicht haben. Binden Sie die Enden ab, und fertig.
Woraus lassen sich Freundschaftsbänder am besten basteln?
Stickgarn ist für die meisten Menschen die erste Wahl. Es ist stark, in allen erdenklichen Farben erhältlich und ermöglicht glatte Knoten.
Wenn Sie Perlen verwenden möchten, eignen sich dehnbare Kordeln oder elastische Fäden gut. Baumwollfaden und dünnes Garn sind ebenfalls geeignet, aber Stickgarn liefert für den klassischen Look die besten Ergebnisse.
Wie macht man Schritt für Schritt ein Freundschaftsarmband?
Wählen Sie zunächst Ihre Farben aus und schneiden Sie die Fäden auf die gleiche Länge. Machen Sie an einem Ende einen Knoten, um sie zusammenzuhalten, und kleben oder stecken Sie dieses Ende dann fest, damit sich nichts bewegt.
Machen Sie Vorwärts- oder Rückwärtsknoten mit einem Strang über den anderen, um Ihr Muster zu erstellen. Wiederholen Sie dies, bis es lang genug für Ihr Handgelenk ist.
Sind Freundschaftsbänder schwer herzustellen?
Die meisten einfachen Armbänder sind nicht schwer, wenn Sie den Dreh mit dem Hauptknoten erst einmal raus haben. Einfache Muster verwenden nur zwei oder drei Knotenarten, sodass Sie den Dreh nach etwas Übung raushaben werden.
Wenn Sie klare Schritte befolgen und sich nicht beeilen, können sogar Anfänger ein Armband herstellen, das ziemlich ordentlich aussieht.
Wie macht man ein Freundschaftsarmband mit Drehverschluss?
Nehmen Sie zwei oder mehr Schnüre gleicher Länge und binden Sie sie an einem Ende zusammen. Halten Sie jeden Strang fest und drehen Sie sie fest in die gleiche Richtung.
Drehen Sie weiter, bis sich die Stränge leicht aufrollen. Falten Sie die gedrehten Stränge in der Mitte und lassen Sie sie umeinander wickeln.
Binden Sie die losen Enden zusammen. Fertig ist ein einfaches Freundschaftsarmband mit Drehverschluss.


