
Stickornamente sind eine tolle Möglichkeit, Ihre Stickereien in bezaubernde Dekorationen für Ihr Zuhause oder in aufmerksame Geschenke zu verwandeln.
Sie können sie in jedem Stil herstellen, von klassisch bis modern, und sie für Ihren Weihnachtsbaum, Ihre Wände oder sogar als Schlüsselanhänger verwenden.
Für diese einfachen Projekte benötigen Sie nur Stoff , Faden, einen Stickrahmen und Ihr Lieblingsmuster.
Erfahren Sie, wie Sie Ihre Stickereien zu hübschen Ornamenten verarbeiten und erhalten Sie Tipps, wie Sie jedes einzelne Stück zu etwas Besonderem machen. Genießen Sie das ganze Jahr über Ihre handgefertigten Kreationen.
Kurze Einblicke ⚡:
- Stickornamente sind handgefertigte Dekorationsstücke mit gestickten Mustern.
- Als Unterlage können Sie Reifen, Stoffreste oder Filz verwenden.
- Perfekt für Feiertage, als Geschenk oder als Dekoration für Ihr Zuhause.
- Individualisieren Sie mit Namen, Daten oder besonderen Motiven.
Was sind Stickornamente?
Stickornamente sind kleine Dekorationsartikel, die durch das Aufsticken von Motiven auf Stoff entstehen. Sie sind in vielen Formen erhältlich, lassen sich leicht personalisieren und eignen sich als durchdachte und dennoch schlichte Geschenke oder Weihnachtsdekorationen. Diese Ornamente verwenden oft klassische Techniken und können festliche Motive aufweisen.
Warum Stickornamente herstellen?
Mit Stickornamenten verleihen Sie Ihrer Weihnachtsdekoration eine persönliche Note. Verwenden Sie Initialen, Daten oder Lieblingsfarben, um jedes Ornament zu etwas Besonderem für Ihr Zuhause oder Ihre Freunde zu machen.
Auch kleine Stickereien können zu Andenken werden. Hängen Sie sie an Ihren Weihnachtsbaum, stellen Sie sie im Haus auf oder bewahren Sie sie als schöne Erinnerung auf.
Wenn Sie Ihre fertigen Stiche in Ornamente verwandeln, geben Sie Ihrer Arbeit einen neuen Zweck. So können Sie Ihre Handarbeiten das ganze Jahr über auf unterhaltsame Weise präsentieren.
Bestickte Ornamente sind tolle Geschenke zu Weihnachten und anderen besonderen Anlässen. Sie haben eine besondere Bedeutung, da sie mit Sorgfalt handgefertigt werden.
Beliebte Stickornament-Stile
Es gibt verschiedene gängige Stickornament-Stile, die Sie ausprobieren können. Hier sind drei beliebte Optionen:
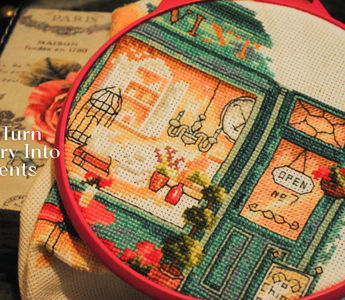
- Stickrahmen-Ornamente: Kleine Stickrahmen rahmen das gestickte Design ein und erleichtern das Aufhängen an einem Baum.
- Ausgeschnittene Stoffornamente: Dabei handelt es sich um aus besticktem Stoff ausgeschnittene Formen, die oft mit genähten oder geklebten Kanten versehen und dann mit einem Band aufgehängt werden.
- 3D-Plüschornamente: Diese werden zusammengenäht und dann mit weicher Füllung gefüllt, wodurch sie prall aussehen. Sie können die Form von Sternen, Bällen oder Tieren haben.
Viele bestickte Weihnachtsornamente verwenden diese Stile. Die Wahl des Stils hängt vom gewünschten Design und der geplanten Präsentation des Ornaments ab.
Verwendete Sticktechniken
Für Ornamente eignen sich verschiedene Sticktechniken. Je nach Ihrem Kenntnisstand können Sie einfache oder anspruchsvollere Stiche verwenden.
- Beim Handsticken werden oft einfache Stiche wie Rückstich, Plattstich und französische Knoten verwendet.
- Mit der Maschinenstickerei können Sie schnell detaillierte Designs erstellen, insbesondere bei größeren Auflagen.
- Manche Leute verwenden Applikationen , indem sie Stoffformen auf eine Unterlage nähen, bevor sie Stiche hinzufügen.
Diese Methoden können kombiniert oder unabhängig voneinander verwendet werden. Für weihnachtliche Stickornamente können Sie Perlen, Pailletten oder Metallfäden verwenden, um Ihr Design funkeln zu lassen. Die gewählte Technik hängt von Ihrer Zeit, Ihren Materialien und Ihrem persönlichen Geschmack ab.
Benötigte Materialien für DIY-Stickornamente

Um Ihre eigenen Stickornamente herzustellen, benötigen Sie einige grundlegende Nähwerkzeuge und einige Extras zum Verzieren und Fertigstellen Ihres Projekts. Die Wahl der richtigen Materialien trägt dazu bei, dass Ihre Ornamente ordentlich aussehen und länger halten.
Wichtige Stickmaterialien
 |
Beginnen Sie mit einem kleinen Stickrahmen . Rahmen mit einer Größe von 3 bis 4 Zoll eignen sich am besten für Ornamente, da sie leicht sind und sich einfach aufhängen lassen. |

|
Sie benötigen außerdem ein Stück Stoff , beispielsweise Leinen, Baumwolle oder Filz. Baumwolle und Leinen sind glatt und daher leicht zu nähen. Filz ist dicker und kann sowohl als Hauptgewebe als auch als stabile Unterlage verwendet werden. |

|
Wählen Sie Stickgarn in den gewünschten Farben für Ihr Design. Diese Fäden sind in vielen Farben erhältlich und lassen sich bei Bedarf leicht in dünnere Stränge aufteilen. |

|
Sie benötigen eine Nadel mit einer scharfen Spitze und einem Öhr, das groß genug für Ihren Stickfaden ist. Normale Sticknadeln sind eine gute Wahl. |
 |
Mit einer kleinen Schere können Sie Fäden abschneiden und den Stoff sauber zuschneiden. Sie können Ihr Design auch mit einem wasserlöslichen Stift oder Bleistift auf den Stoff skizzieren, bevor Sie mit dem Nähen beginnen. |
Checkliste für die Versorgung:
- 3-4 Zoll Stickrahmen
- Stoff (Leinen, Baumwolle oder Filz)
- Stickgarn
- Nadeln
- Kleine Schere
- Wasserlöslicher Markierstift (optional)
Zusätzliche Verzierungen
Nachdem Sie die Hauptnähte fertiggestellt haben, können Sie zusätzliche Materialien zum Verzieren und Verzieren Ihres Ornaments verwenden. Ein Band eignet sich hervorragend, um eine Schlaufe zu basteln, mit der Sie Ihr Ornament am Baum oder an einem Haken aufhängen können. Sie können auch Perlen oder Pailletten hinzufügen, um dem Design einen Hauch von Glanz zu verleihen.
Um Ihrem Ornament ein zartes Aussehen zu verleihen, können Sie Spitze um die Ränder nähen. Schneiden Sie für die Rückseite einen Kreis aus Filz oder Pappe aus, wobei Sie die Größe Ihres Rahmens als Orientierung verwenden.
Filz ist weich und kann angenäht oder angeklebt werden. Karton verleiht Festigkeit und kann für zusätzlichen Halt auf die Rückseite geklebt werden.
Beliebte Verzierungen:
- Band (zum Aufhängen)
- Perlen oder Pailletten
- Spitzenbesatz
- Trägerfilz
- Dünner Karton als Unterlage
Sie können diese Extras ganz nach Ihrem Stil kombinieren. Legen Sie sich vor dem Start alle Materialien zurecht, und schon können Sie bezaubernde Dekorationen kreieren.
🪡Lesen Sie auch: Über 15 wichtige Stickwerkzeuge für Anfänger und Experten
So verwandeln Sie Ihre Stickerei in ein Ornament: Schritt für Schritt

Mit den richtigen Schritten verwandeln Sie Ihre Stickerei ganz einfach in ein Ornament. Sie müssen Ihr Stickstück vorbereiten, die Form des Ornaments auswählen, die Teile zusammenfügen, Dekorationen hinzufügen und schließlich eine Aufhängung für das Ornament finden.
Schritt 1 – Bereiten Sie Ihr Stickstück vor
Schneiden Sie zunächst den bestickten Stoff zu und lassen Sie rund um Ihr Motiv etwa 2,5 cm Platz. Der zusätzliche Stoff erleichtert die Montage erheblich. Verwenden Sie eine scharfe Stoffschere für eine saubere, glatte Kante.
Bügeln Sie anschließend Ihre Stickerei, um Knicke und Fältchen zu entfernen. Legen Sie ein Bügeltuch über die Stickerei, um Ihre Stiche zu schützen. Verwenden Sie eine niedrige bis mittlere Hitzeeinstellung und gehen Sie langsam vor, um ein Verbrennen des Stoffes zu vermeiden.
Um die Stabilität Ihres Ornaments zu gewährleisten, befestigen Sie auf der Rückseite Ihrer Stickerei ein Vlies. Leichte Einlage oder ein aufbügelbares Vlies eignen sich gut. Schneiden Sie ein Stück etwas größer als Ihr Motiv zu und bügeln Sie es gemäß den Anweisungen auf dem Vlies auf die Rückseite.
Schritt 2 – Auswählen und Vorbereiten der Ornamentform
Entscheiden Sie sich für die Form Ihres Ornaments. Beliebte Formen sind Kreise, Ovale und Herzen. Sie können einen Stickrahmen, einen kleinen Holzrahmen oder eine stabile Kartonschablone verwenden.
Wenn Sie ein weicheres Ornament wünschen, schneiden Sie ein Stück Watte oder Filz in der gewünschten Form aus. Dieses wird hinter Ihre Stickerei gelegt, um das Ornament plüschig zu machen. Schneiden Sie alle Stücke auf die gleiche Größe zu, damit sie sauber aneinandergereiht sind.
Stellen Sie sicher, dass Ihr Trägerstoff oder Filz faltenfrei und sauber ist. Wenn Sie einen Stickrahmen verwenden, achten Sie darauf, dass er die richtige Größe für Ihre Stickerei hat. Legen Sie alle Materialien in einen kleinen Arbeitsbereich, um alles übersichtlich zu halten.
Schritt 3 – Das Ornament zusammenbauen
Legen Sie Ihre Stickerei flach und zentrieren Sie sie auf den gewählten Rahmen, Stickrahmen oder die Schablone. Wenn Sie einen Stickrahmen verwenden, legen Sie den Stoff an und spannen Sie ihn fest.
Bei anderen Formen können Sie die Stickerei mit etwas abwaschbarem Kleber oder doppelseitigem Klebeband auf der Rückseite befestigen und dabei auf die Mitte achten.
Falten oder schneiden Sie den überschüssigen Stoff so ab, dass er glatt hinter die Ornamentbasis passt. Nähen Sie die Kanten mit Nadel und Faden an den Trägerstoff oder kleben Sie sie sauber fest, um ein Finish ohne sichtbare Stiche zu erzielen.
Wenn Sie Watte oder Filz hinzugefügt haben, legen Sie diese zwischen die Stickerei und die Rückseite. Achten Sie darauf, dass die Lagen gleichmäßig sind und die Kanten nicht zu dick sind.
Schritt 4 – Fertigstellen und Dekorieren
Schneiden Sie ein Stück passenden Stoff oder Filz zu, um die Rückseite zu bedecken. So werden alle Schnittkanten verdeckt und Ihr Ornament erhält ein elegantes Aussehen. Kleben oder nähen Sie die Rückseite fest und verdecken Sie alle offenen Nähte.
Verzieren Sie die Dekoration nach Belieben. Einfache Ideen sind das Aufnähen oder Aufkleben von Bändern, das Besticken der Bordüre mit Perlen oder das Anbringen kleiner Anhänger. Verwenden Sie Bastelkleber für Gegenstände, die sich schwer annähen lassen.
Überprüfen Sie die Vorder- und Rückseite sorgfältig, um alle losen Fäden oder Klebeflecken zu entfernen, bevor Sie mit dem nächsten Schritt fortfahren.
Schritt 5 – Eine Aufhängeöse oder einen Aufsatz hinzufügen
Schneiden Sie ein Stück Band, Schnur oder starken Faden ab und verwenden Sie es als Schlaufe für Ihr Ornament. Die Länge hängt davon ab, wie tief das Ornament hängen soll, aber 10 bis 15 cm reichen für die meisten Ornamente.
Falten Sie die Schlaufe in der Mitte und befestigen Sie die Enden sicher an der Oberseite Ihres Ornaments. Sie können die Schlaufe zwischen Rückseite und Stickerei nähen, um sie unsichtbar zu befestigen, oder sie flach auf die Rückseite kleben, wenn Sie möchten.
Für verschiedene Aufhängeideen können Sie einen Metallhaken, einen Biegering oder sogar eine Mini-Wäscheklammer verwenden. Stellen Sie sicher, dass die Befestigung sicher ist, bevor Sie Ihr fertig gesticktes Ornament aufhängen.
🪡Lesen Sie auch: So verwenden Sie einen Stickrahmen: Leitfaden für Anfänger
Kreative Ideen für Stickornamente

Stickornamente können Feiertage verschönern, besondere Erinnerungen festhalten und Ihre Kreativität unter Beweis stellen. Sie können klassische Themen verwenden, Namen oder Daten hinzufügen oder verschiedene Materialien kombinieren, um einen einzigartigen Look zu kreieren.
Feiertagsornamente (Weihnachten, Ostern, Halloween)
Weihnachtsornamente gehören zu den beliebtesten Stickprojekten. Zu Weihnachten können Sie Schneeflocken, Rentiere, Bäume, Ornamente oder Weihnachtsmanngesichter auf Filz oder Stoff sticken.
Einfache Designs wie Sterne, Glocken oder Feiertagswörter sehen toll aus und dauern nicht zu lange.
Zu Osterdekorationen gehören oft bunte Eier, Hasen und Frühlingsblumen. Verwenden Sie Pastellfarben oder helle Fäden für einen fröhlichen Look.
Sie können diese an Zweige hängen oder in einem Osterkorb verwenden.
Halloween-Stickereien könnten Kürbisse, Fledermäuse, Geister oder schwarze Katzen zeigen. Für eine lustige Note können Sie im Dunkeln leuchtende Fäden verwenden.
Diese eignen sich gut zum Dekorieren Ihres Hauses oder zum Hinzufügen zu Leckerli-Tüten.
Tipps für Weihnachtsschmuck:
- Wählen Sie kräftige, gut sichtbare Farben
- Verwenden Sie Filzkreise oder kleine Reifen als Basis
- Fügen Sie ein Band oder eine Schnur zum Aufhängen hinzu
- Beschränken Sie sich auf einfache Stiche wie Rückstich oder Satinstich
Personalisierte Andenken mit Namen und Datum
Personalisierter Schmuck ist eine tolle Möglichkeit, besondere Ereignisse wie den ersten Urlaub eines Babys oder ein schönes Familientreffen zu würdigen.
Sie können Namen, besondere Daten oder sogar kurze Nachrichten sticken. So entstehen aufmerksame Geschenke für Freunde und Familie.
Wählen Sie klare, gut lesbare Schriftarten. Sie können den Namen und das Jahr schreiben oder ein kleines Bild zum Text hinzufügen. Manche Menschen lassen sich von besonderen Anlässen wie Hochzeiten oder Schulabschlüssen inspirieren.
Vielleicht möchten Sie:
- Verwenden Sie einen Stoffmarker, um Ihre Wörter vor dem Nähen aufzuschreiben
- Wählen Sie Garnfarben, die zu den Lieblingsfarben der Person passen
- Verwenden Sie kontrastierende Farben, damit die Buchstaben hervorstechen
- Fügen Sie einen kleinen Rand oder dekorative Elemente (wie Herzen oder Sterne) hinzu.
Ornamente aus verschiedenen Medien (mit Perlen, Pailletten oder Farbe)
Stickornamente können durch zusätzliche Materialien interessanter gestaltet werden. Perlen und Pailletten verleihen Glanz und Struktur. Sie können sie mit Ihren Stichen aufnähen oder zum Ausfüllen von Formen verwenden. Farbe eignet sich gut für Hintergründe oder kleine Details.
Einige unterhaltsame Möglichkeiten zum Mischen von Materialien:
- Kleine Glasperlen zu Schneeflocken oder Sternen nähen
- Befestigen Sie Pailletten an Blumen oder Baumschmuck für zusätzlichen Glanz
- Verwenden Sie Stofffarbe, um Punkte oder Linien hinzuzufügen, und lassen Sie sie trocknen, bevor Sie weiter sticken
- Versuchen Sie, Filz, Bänder oder Spitze zusammen mit Ihrer Stickerei zu verwenden.
Halten Sie Ihr Design beim Mischen von Medien einfach, um ein überladenes Erscheinungsbild zu vermeiden. Testen Sie neue Ideen an Stoffresten, bevor Sie an Ihrem Hauptstück arbeiten. So sehen Sie, was am besten funktioniert.
🪡Lesen Sie auch: Einzigartige Geschenkideen mit Stickereien zum Selbermachen und Teilen
Tipps für perfekte Stickornamente
Hochwertige Stickornamente beginnen mit den richtigen Materialien und halten am längsten, wenn sie richtig verarbeitet und gepflegt werden.
Wenn Sie auf Details wie die Stoffauswahl und die Kantenbearbeitung achten, können Sie dafür sorgen, dass Ihre Ornamente besser aussehen und Jahr für Jahr länger halten.
Auswahl des richtigen Stoffes und Fadens
Wählen Sie einen Stoff, der robust ist und sich nicht verformt. Filz und Baumwolle sind beliebt, da sie robust und leicht zu nähen sind. Filz franst insbesondere nicht aus und ist auch für Anfänger einfach zu verarbeiten.
Wählen Sie einen Faden, der zu Ihrem Stoff passt oder ihn ergänzt. Baumwollstickgarn ist für die meisten Projekte die erste Wahl, aber Metallic- oder Viskosegarne verleihen bei besonderen Anlässen Glanz. Halten Sie sich an Qualitätsmarken, um Fadenzieher und Knoten zu vermeiden.
Versuchen Sie, Ihre Farbauswahl einfach zu halten. Die Verwendung von zwei oder drei Hauptfarben kann dazu beitragen, dass Ihr Design einheitlich und nicht zu überladen wirkt.
Mithilfe eines Farbkreises können Sie erkennen, welche Farbtöne gut zusammenpassen.
Ornamente haltbar und langlebig machen
Um die Form Ihrer Ornamente zu erhalten, sollten Sie die Kanten immer versiegeln. Bei Filz können Sie einen Steppstich um die Kanten verwenden. Bei Baumwollornamenten ist ein umgeschlagener Rand oder ein Zickzackstich oft hilfreich, um ein Ausfransen zu verhindern.
Wenn sich Ihr Ornament zu schlaff anfühlt, verwenden Sie eine Einlage oder eine zusätzliche Stoffschicht. Dies verleiht dem Ornament Festigkeit, ohne es sperrig zu machen.
Lagern Sie fertige Ornamente an einem trockenen, kühlen Ort und vor direkter Sonneneinstrahlung geschützt. Legen Sie sie in kleine Schachteln oder Stoffbeutel, um sie vor Staub zu schützen.
Drücken Sie sie niemals unter schwere Gegenstände und hängen Sie sie nicht an Orte, an denen sie häufig angestoßen werden.
Seien Sie beim Umgang und Reinigen behutsam. Reinigen Sie Flecken bei Bedarf mit einem feuchten Tuch. Weichen Sie gestickte Ornamente jedoch nicht in Wasser ein.
Abschließende Gedanken
Mit Stickornamenten können Sie Ihrer Kreativität auf einfache und bedeutungsvolle Weise Ausdruck verleihen. Sie können sie als Dekoration für Feiertage oder Jahreszeiten verwenden oder jedem Raum eine handgemachte Note verleihen.
Kleine Stickprojekte lassen sich leicht beginnen und beenden. Selbst Anfänger können mit Filz, Stoff und einfachen Stichen beeindruckende Ergebnisse erzielen. Fehler sind normal und gehören zum Lernen dazu.
Hier sind einige kurze Tipps, die Sie beachten sollten:
- Wählen Sie für beste Ergebnisse robuste Materialien.
- Üben Sie die Grundstiche, bevor Sie mit detaillierten Mustern beginnen.
- Halten Sie Ihre Threads organisiert.
Handgefertigte Ornamente eignen sich auch gut als aufmerksames Geschenk. Ein personalisiertes Stück zeugt von Sorgfalt und Mühe. Sie können sie in jeder Farbe und jedem Stil für ganzjährige Dekorationen herstellen.
Führen Sie ein kleines Notizbuch, in dem Sie Musterideen, Garnfarben oder Geschenke, die Sie gemacht haben, notieren. So behalten Sie den Überblick über Ihren Fortschritt und können neue Ideen entwickeln.
Nehmen Sie sich Zeit und genießen Sie jeden Schritt des Prozesses. Stickornamente müssen nicht perfekt sein, um bedeutungsvoll zu sein.
❓Häufig gestellte Fragen
Es gibt viele Möglichkeiten, Stickornamente herzustellen und zu präsentieren. Die Wahl des Stoffes, der Aufhängung und der Projektidee kann sich auf das Ergebnis auswirken.
Welches sind die beliebtesten Ornamente?
Zu den üblichen Stickornamenten zählen Weihnachtsformen wie Schneeflocken, Sterne und Bäume. Auch Stickrahmen mit Blumen- oder Tiermotiven sind beliebt. Viele Menschen personalisieren Ornamente gerne mit Namen oder Daten.
Welcher Stoff eignet sich am besten für Stickornamente?
Baumwolle und Leinen lassen sich leicht verarbeiten und eignen sich gut für kleine Projekte. Filz ist ebenfalls beliebt, insbesondere wenn Sie einen einfarbigen Hintergrund wünschen. Starker, dicht gewebter Stoff sorgt dafür, dass Ihre Stiche gleichmäßig bleiben.
Wie kann man Stickornamente am einfachsten aufhängen?
Zum Aufhängen von Ornamenten eignen sich Metallhaken, Bandschlaufen oder einfacher Faden. Wenn Sie Ihr Ornament in einem Stickrahmen anfertigen, binden Sie ein Band um die obere Schraube, um es schnell aufzuhängen.
Kann ich vorhandene Stickprojekte als Ornamente verwenden?
Ja, Sie können kleine Abschnitte der fertigen Stickerei ausschneiden und einrahmen, um Ornamente zu erstellen. Befestigen Sie die Kanten mit Klebstoff oder nähen Sie sie auf eine Unterlage, um ein saubereres Aussehen zu erzielen.
Sind Stickornamente für Anfänger geeignet?
Mit einfachen Stichen und Materialien lassen sich einfache Stickmuster herstellen. Muster für Anfänger verwenden oft nur wenige Farben und einfache Formen. Wenn Sie klein anfangen, können Sie üben, bevor Sie sich an anspruchsvollere Designs wagen.


