Das Ausprobieren verschiedener Häkeltechniken macht Ihr Hobby zu etwas ganz Besonderem! Mit nur einer Häkelnadel und Garn können Sie mit verschiedenen Methoden alles von einfachen Schals bis hin zu komplexen Spielzeugen herstellen.
Mit zunehmender Erfahrung werden Sie feststellen, dass jede Technik einzigartige Texturen und Muster erzeugt. Probieren Sie anfängerfreundliche Maschen wie feste und doppelte Häkelmaschen aus, bevor Sie sich an anspruchsvollere Maschen wie Tunesisch oder Besenstiel wagen.
Lust auf süße Kuscheltiere? Lerne Amigurumi! Lust auf eine interessante Textur? Versuch es mit keltischem Weben! Die ganze Welt des Häkelns wartet auf dich.
Lesen Sie weiter, um Techniken zu entdecken, die Ihre Projekte zu etwas ganz Besonderem machen!
Grundlegende Häkeltechniken
Das Beherrschen einiger grundlegender Techniken bildet Ihre Grundlage für das Häkeln. Diese Fähigkeiten helfen Ihnen, selbstbewusst und mühelos schöne Projekte zu erstellen.
Grundlegende Hakenhandhabung und Stichtechniken
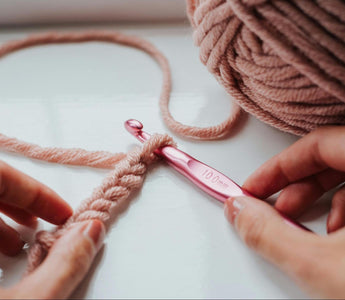
Der erste Schritt zum Häkelerfolg ist die richtige Häkelnadelhaltung. Du kannst entweder den Bleistiftgriff (wie einen Bleistift) oder den Messergriff (wie ein Messer) verwenden. Probiere beide Griffe aus, um herauszufinden, welche sich für dich angenehmer anfühlt.
Wenn Sie ein Projekt beginnen, machen Sie zuerst einen Laufknoten. Dadurch entsteht Ihre erste Schlaufe auf der Nadel. Als nächstes folgt die Grundkette aus Kettenstichen, die die Basis Ihrer Arbeit bilden.
Beim Umwickeln (Yo) wird der Faden um die Nadel gewickelt. Das macht man bei fast jeder Masche! Die Kettmasche ist die kürzeste Häkelmasche. Sie hilft beim Zusammenfügen von Teilen oder beim Bewegen der Maschen, ohne die Höhe zu erhöhen.
Hier sind wichtige Techniken zum Üben:
- Einen Laufknoten machen
- Erstellen von Kettenstichen
- Drehen Sie Ihre Arbeit
- Stiche zählen
- Lesemuster
Um zu sehen, wie sie gemacht werden, schauen Sie sich dieses Video von Fiber Flux an:
Häkelmethoden für einfache, doppelte und dreifache Maschen

Die feste Masche (SC) ist klein und eng. Führen Sie Ihre Häkelnadel in die Masche ein, legen Sie den Faden darüber, ziehen Sie ihn durch die Masche, legen Sie den Faden erneut darüber und ziehen Sie ihn durch beide Schlaufen auf Ihrer Häkelnadel.
Dadurch entsteht ein dichter Stoff, der sich perfekt für Amigurumi oder robuste Gegenstände eignet.
Halbe Stäbchen (HDC) sind etwas höher als feste Maschen. Legen Sie den Faden über die Masche, bevor Sie die Nadel einführen, ziehen Sie ihn dann durch die Masche, legen Sie den Faden über die Masche und ziehen Sie ihn durch alle drei Schlaufen auf der Nadel.
Durch das Doppelhäkeln (DC) entsteht ein höherer, luftigerer Stoff. Faden über die Nadel legen, Faden über die Nadel legen, durch die Masche ziehen (drei Schlaufen auf der Nadel), Faden über die Nadel legen, durch zwei Schlaufen ziehen, erneut Faden über die Nadel legen, durch die verbleibenden zwei Schlaufen ziehen.
Üben Sie diese Grundstiche:
- Feste Masche - kürzeste Masche
- Halbes Stäbchen - mittlere Höhe
- Doppelhäkeln – höhere Masche
- Dreifachhäkeln – höchste Grundmasche
Lernen Sie, wie man die Grundstiche macht, indem Sie sich dieses Video auf YouTube ansehen: @do with reyhane:
Textur- und Mustertechniken

Wenn Sie Ihren Häkelprojekten Struktur verleihen, fallen sie auf. Mit dem richtigen Stich wird aus einer einfachen Decke oder einem Schal etwas Besonderes, nach dem die Leute fragen werden.
Poststiche, Cluster und Noppen
Vordere und hintere Pfostenstiche verleihen Ihrer Arbeit eine erstaunliche Textur. Wenn Sie Ihren Haken um den Pfosten wickeln, anstatt durch die oberen Schlaufen, entstehen Rippen.
Versuchen Sie es mit Front Post Double Crochet (FPDC) für erhabene Teile und Back Post Double Crochet (BPDC) für vertiefte Bereiche.
Clusterstiche gruppieren mehrere Stiche oben. Sie können Folgendes machen:
- 3-dc-Cluster (3 Doppelhäkeln oben verbunden)
- Puffmaschen (Umschläge durch dieselbe Masche gezogen)
- Popcorn (Gruppe von Stichen verbunden und nach vorne gezogen)
Der Noppenstich eignet sich perfekt, um Ihrer Arbeit kleine Unebenheiten zu verleihen. Machen Sie 5 unfertige Doppelhäkelmaschen in dieselbe Masche und ziehen Sie sie dann durch alle Schlaufen auf einmal.
Bommeln sehen auf Mützen, Decken und sogar Geschirrtüchern toll aus!
Hier ist ein Video, das Ihnen zeigt, wie Sie diesen schönen Stich machen:
Waffel-, Muschel- und V-Stich-Methoden
Der Waffelstich erzeugt eine tiefe, matschige Textur, die aussieht wie eine Waffel! Sie arbeiten Reihen abwechselnder vorderer Doppelhäkelmaschen mit normalen Doppelhäkelmaschen in einem bestimmten Muster.
Muschelstiche bilden fächerartige Formen, indem mehrere Stiche in einen Raum gestickt werden. Grundlegende Muschel:
- Eine Masche überspringen
- Arbeiten Sie 5 Doppelmaschen in die nächste Masche
- Eine weitere Masche überspringen
- Feste Masche in die nächste
V-Stiche erzeugen spitzenartige, offene Muster, die sich perfekt für Sommerkleidung eignen. Machen Sie ein V, indem Sie (Stb, 1 Luftmasche, Stb) in dieselbe Masche häkeln.
Platzieren Sie in der nächsten Reihe Ihre V-Maschen in den Zwischenräumen der Luftmaschenkette der Vs der vorherigen Reihe.
Probieren Sie diese Stiche zunächst in kleinen Mustern aus, bevor Sie sie in größere Projekte integrieren. So lernen Sie das Muster, ohne sich gleich auf ein ganzes Projekt einzulassen!
Möchten Sie noch mehr Maschenoptionen erkunden, um Ihr Repertoire zu erweitern? Tauchen Sie ein in unseren Leitfaden „Häkelmaschenarten: Einfache bis fortgeschrittene Maschen“ , um endlose kreative Möglichkeiten zu entdecken!
Farbe und fortgeschrittene Techniken
Durch das Hinzufügen von Farben und das Erlernen fortgeschrittener Techniken können Sie Ihre Häkelprojekte von einfach zu atemberaubend machen. Diese Methoden mögen zunächst knifflig erscheinen, aber mit etwas Übung werden sie zu wertvollen Fähigkeiten in Ihrem Bastel-Toolkit.
Farbwechsel, Garnverbindungen und Tapisseriemethoden
Durch Farbwechsel beim Häkeln entstehen wunderschöne Muster und Designs. Die einfachste Methode ist, die Farbe am Ende einer Reihe zu wechseln. Führen Sie Ihre Masche bis zum letzten Umschlag zu Ende und ziehen Sie dann die neue Farbe durch. So entsteht ein sauberer Übergang.
Bei Farbwechseln in der Mitte der Reihe arbeiten Sie so lange, bis die letzten beiden Schlaufen auf der Nadel sind. Nehmen Sie dann den Faden mit der neuen Farbe auf und ziehen Sie ihn durch. Diese Technik eignet sich hervorragend für Farbmuster.
Das Zusammenfügen von Garn ist ähnlich. Sie können Knoten binden, aber die beste Methode ist, mehrere Maschen über das Ende des neuen Garns zu häkeln. Dadurch wird die Verbindung verborgen und Ihre Arbeit bleibt ordentlich.
Mit Tapestry-Häkeln können Sie Bilder und Muster in Ihre Arbeit einarbeiten. Sie führen das übrige Garn hinter Ihren Maschen und arbeiten es beim Häkeln weiter. Mit dieser Technik entstehen atemberaubende Graphghans und gemusterte Artikel.
Gestalten Sie farbenfrohere und komplexere Designs. Sie möchten sanfte Farbübergänge meistern? Unser Leitfaden „Farbwechsel beim Häkeln: Schritt für Schritt“ zeigt Ihnen genau, wie Sie professionell aussehende Ergebnisse erzielen!
Tunesische, C2C- und Amigurumi-Techniken

Beim tunesischen Häkeln wird mit einer speziellen langen Häkelnadel ein Stoff hergestellt, der wie eine Mischung aus Stricken und Häkeln aussieht. Dabei werden Maschen über eine Reihe aufgenommen und anschließend in einem Rücklauf wieder abgearbeitet. Mit dieser Technik entsteht dicker, warmer Stoff, der sich perfekt für Decken und Schals eignet.
Der magische Ring eignet sich besonders gut für Rundprojekte. Sind Sie bereit, diese bahnbrechende Methode zu erlernen? Unser Artikel „ Wie man einen magischen Ring häkelt“ erklärt sie in einfachen, leicht verständlichen Schritten!
Corner-to-Corner (C2C)-Häkeln beginnt an einer Ecke und wächst diagonal. Sie arbeiten kleine Maschenblöcke, die aufeinander aufbauen. C2C eignet sich perfekt für Graphghans und Decken mit Bildern oder Wörtern.
Amigurumi ist die japanische Kunst, kleine Stofftiere zu häkeln. Bei dieser Technik werden feste Maschen in fortlaufenden Runden gearbeitet.
Sie benötigen Folgendes:
- Kleinere Haken als Ihr Garn erfordert
- Maschenmarkierer zum Verfolgen der Runden
- Polyester-Füllwatte zum Füllen
- Sicherheitsaugen oder Stickgarn für Gesichter
Durch das Arbeiten in einer Spirale entstehen nahtlose Spielzeuge ohne sichtbare Verbindungslinien. Für Anfänger sollte Ihr Amigurumi-Garn mittelschwer sein, für Detailarbeiten können Experten jedoch feinere Garne verwenden.
Konstruktions- und Veredelungstechniken
Die Art und Weise, wie Sie Ihre Häkelprojekte gestalten und fertigstellen, beeinflusst maßgeblich deren Aussehen und Haptik. Gute Techniken sorgen dafür, dass Ihre Arbeit sauber und professionell aussieht, auch wenn Sie Anfänger sind.
Arbeiten in Runden vs. Reihen
Beim Häkeln arbeiten Sie entweder in Reihen oder Runden. Die Reihen gehen wie eine Schaukel hin und her und erzeugen flache Stücke.
Sie wenden Ihre Arbeit am Ende jeder Reihe. Diese Methode eignet sich hervorragend für Decken, Schals und Waschlappen.
Bei Runden hingegen geht es im Kreis. Sie drehen Ihre Arbeit nicht.
Stattdessen verbinden Sie das Ende jeder Runde mit einem Kettstich mit dem Anfang oder arbeiten in einer Spirale. Runden eignen sich perfekt für Hüte, Amigurumi-Spielzeug und Körbe.
Tipps zum Arbeiten in Runden:
- Markieren Sie mit einem Maschenmarkierer die erste Masche
- Zählen Sie Ihre Maschen nach jeder Runde
- Verbinden Sie mit einem Kettstich oder versuchen Sie den „Secret Sew Finish“ für unsichtbare Verbindungen
Tipps zum Arbeiten in Reihen:
- Kette die richtige Zahl am Ende jeder Reihe für die Höhe
- Seien Sie vorsichtig mit Ihren ersten und letzten Stichen
Verbindungs-, Blockierungs- und Kantenmethoden
Nachdem Sie Ihr Hauptprojekt abgeschlossen haben, müssen Sie Teile zusammenfügen, Ihre Arbeit blockieren und Kanten hinzufügen. Zu den Verbindungsmethoden gehören Überwendlingsstich, Matratzenstich und Häkelverbindungen.
Wählen Sie basierend auf den Anforderungen Ihres Projekts.
Durch das Blockieren behält Ihre Arbeit ihre Form. Stecken Sie Ihr fertiges Stück auf die gewünschte Größe fest und gehen Sie dann wie folgt vor:
- Mit Wasser besprühen, bis es feucht ist
- Vollständig trocknen lassen
- Pins entfernen
Kanten verleihen Ihrem Projekt den letzten Schliff. Einfache Einzelhäkelkanten eignen sich gut für Anfänger.
Doppelhäkelkanten bilden einen schönen Rahmen. Sie können zur Dekoration auch gewellte oder Picot-Kanten ausprobieren.
Vergessen Sie nicht, lose Enden einzuweben! Verstecken Sie sie in Ihren Stichen für ein sauberes Finish.
Abschließende Gedanken
Jetzt hast du ein gutes Verständnis für verschiedene Häkeltechniken, die du auf deiner Bastelreise ausprobieren kannst! Denk daran: Wenn du zuerst die Grundlagen beherrschst, fällt dir das Erlernen komplexerer Methoden viel leichter. Überstürze nichts – genieße den Prozess, dich mit jedem neuen Projekt zu verbessern.
Das Schöne am Häkeln ist, dass man nie aufhört zu lernen. Egal, ob Sie bei einfachen Stichen bleiben oder sich an komplizierte Muster wagen, jede Technik erweitert Ihren kreativen Werkzeugkasten um ein weiteres Werkzeug.
Sobald Sie diese grundlegenden Häkeltechniken und Maschenarten erlernt haben, möchten Sie sie in der Praxis anwenden. Vergessen Sie nicht, Ihre neuen Fähigkeiten zu testen! Lesen Sie unseren Artikel „ 7 einfache Häkelideen für Anfänger zum Ausprobieren“ und fangen Sie sofort an, etwas Schönes zu kreieren!
Bereit, etwas Erstaunliches zu häkeln? Schauen Sie sich Caydos Sammlung von Häkelsets und Strickmaterialien an, um alles zu finden, was Sie zum Üben dieser aufregenden Häkeltechniken benötigen!
Häufig gestellte Fragen
Können Sie einfache Projekte für Häkelanfänger empfehlen?
Geschirrtücher sind perfekt für Anfänger. Sie sind klein, praktisch und erfordern nur einfache Stiche.
Einfache Schals sind ein weiteres tolles Einstiegsprojekt. Sie können Ihre Stiche üben, während Sie etwas Tragbares herstellen.
Stirnbänder sind schnell gemacht und erfordern nicht viel Garn. Es macht Spaß, sie herzustellen und mit verschiedenen Farben individuell zu gestalten.
Topflappen sind praktisch und klein genug, um sie in einer Sitzung fertigzustellen. Sie helfen Ihnen beim Üben der Spannung und der Grundstiche.
Was ist ein guter Ausgangspunkt für Kinder, die Häkeln lernen möchten?
Für Kinder empfiehlt sich eine größere Häkelnadel (6–9 mm). Größere Nadeln sind für kleine Hände leichter zu halten. Helles, dickes Garn eignet sich am besten für Kinder. Die Maschen sind besser zu erkennen und es besteht weniger die Gefahr, dass sie beim Stricken reißen.
Einfache Kettensticharmbänder können ein lustiges erstes Projekt sein. Kinder lieben es, bunte Ketten zu basteln, die sie tragen oder mit Freunden teilen können.
Fingerhäkeln ist eine weitere gute Option für sehr kleine Kinder. Es vermittelt das Konzept ohne die für Haken erforderliche Koordination.
Können Sie die Unterschiede zwischen den verschiedenen Häkelstilen erklären?
Beim amerikanischen Häkeln wird die Häkelnadel wie ein Messer oder ein Bleistift gehalten. Dies ist die in den USA und Kanada am weitesten verbreitete Häkelart.
Beim kontinentalen Stil spannen Sie das Garn mit der linken Hand. Viele finden, dass dies hilft, gleichmäßige Maschen zu erzeugen und schneller zu arbeiten.
Beim tunesischen Häkeln wird mit einer speziellen langen Häkelnadel ein Stoff hergestellt, der wie Strickware aussieht. Es ist eine Mischung aus beiden Handwerken.
Amigurumi ist eine japanische Methode zur Herstellung kleiner Stofftiere. Dabei werden typischerweise feste Einzelmaschen in Runden gehäkelt.
Welche Maschen muss man beim Häkeln unbedingt beherrschen?
Der Kettenstich (ch) bildet die Grundlage der meisten Projekte. Er ist der erste Stich, den Sie lernen, und steht am Anfang fast jedes Projekts.
Mit festen Maschen (sc) entsteht ein fester, stabiler Stoff. Dieser Grundstich eignet sich perfekt für Amigurumi und Waschlappen.
Doppelhäkeln (dc) geht schneller als Einzelhäkeln. Es entsteht ein längerer, flexiblerer Stoff, der sich gut für Decken und Kleidungsstücke eignet.
Halbe Doppelhäkeln (hStb) liegen in der Höhe zwischen festen Maschen und Doppelmaschen. Mit diesem vielseitigen Stich entsteht ein mitteldichter Stoff mit gutem Fall.


