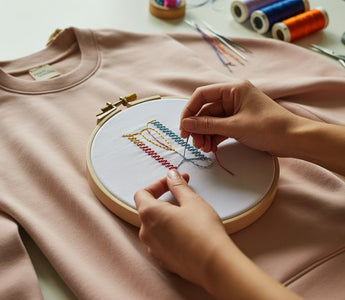
A cozy sweatshirt becomes more than everyday wear when you add embroidery. Whether you use a machine or stitch by hand, each thread brings a personal touch that turns something plain into something unique.
To embroider a sweatshirt, you place your design, secure stabilizer, and use simple stitching techniques to create lasting patterns that reflect your style.
You don’t need fancy tools or advanced skills to get started. With a few basic materials—your sweatshirt, embroidery floss, needles, and a hoop—you can make a design that feels custom-made. This project lets you explore your creativity while learning methods you can use on other fabrics too.
In this guide, you’ll learn how to choose your materials, prepare your fabric, and stitch by hand or machine for smooth, even results.
You’ll also see how to finish and care for your embroidered sweatshirt so it looks neat and lasts through many wears.
Gathering Your Embroidery Supplies

You’ll need the right materials to embroider a sweatshirt successfully. The type of fabric, tools, and stabilizers you choose affects how smooth your stitches look and how long your design lasts.
A few smart supply choices will make your project easier and your results more polished.
Choosing the Right Sweatshirt
Start with a sweatshirt made of cotton or a cotton blend. These fabrics hold stitches well and stretch less than fleece or polyester.
Avoid heavy weaves or thick seams that can make hooping difficult. Look for a smooth surface with minimal texture so your needle doesn’t snag. Sweatshirts with a stable weave, like jersey-knit, work best for both hand and machine embroidery.
Before you begin, wash and dry your sweatshirt to remove sizing or shrinkage. This helps your design stay even after future washes.
If possible, press it lightly with an iron to create a flat surface for stitching. Keep in mind that darker fabrics may require a white or light stabilizer underneath so threads show clearly.
Essential Needles and Hoops
Use embroidery needles sized for medium-weight fabric. A size 5–7 crewel or universal embroidery needle works well for most sweatshirt types.
These have sharp tips that pierce the fabric cleanly while keeping holes small. If you’re machine embroidering, choose a ballpoint or embroidery machine needle to reduce skipped stitches on stretch fabrics. Replace dull needles before each project—sharp points prevent fabric pulls.
An embroidery hoop keeps the sweatshirt surface flat while you stitch. A 6–8 inch hoop fits most chest or sleeve designs.
For bulky fabric, magnetic or screw-tight hoops hold layers firmly without leaving marks. Check that fabric tension stays even but not stretched; this keeps your finished design from puckering. Keep a small pair of embroidery scissors nearby for trimming excess thread neatly between color changes.
Selecting Embroidery Threads and Floss
Choose embroidery thread or floss made from cotton, polyester, or rayon. Cotton floss gives a matte finish, while rayon offers a soft sheen.
For hand embroidery, separate 2–3 strands of six-strand floss to achieve the right thickness. Machine embroidery works best with 40-weight polyester or rayon thread because it resists breakage and color fading.
Match your bobbin thread to the sweatshirt color for a blended back finish. If you’re unsure which thread to use, test a small area first.
Some threads may bleed on dark or damp fabric, especially when washed. Keep them organized on spools or cards so you can find colors easily.
Marking Tools and Stabilizers
Use a fabric marker or heat-erase pen to outline your design. These markings fade with heat or washing, leaving no permanent trace.
Avoid ballpoint pens or permanent markers—they can stain or bleed through the fabric. Place a tear-away or cut-away stabilizer under the design area to support the stitches.
For stretchy sweatshirts, a cut-away stabilizer offers better long-term hold. If your hoop won’t fit the sweatshirt’s thick fabric, apply temporary spray adhesive to attach the stabilizer smoothly without pins.
Keep your layers flat and wrinkle-free as you secure the hoop. Proper stabilization keeps the design crisp and prevents the fabric from stretching or distorting over time.
Prepping and Designing Your Sweatshirt

Start by getting the fabric ready, then focus on adding your design in the right spot. Proper preparation helps prevent puckering and keeps your stitches even and durable during wear and washing.
Washing and Preparing the Fabric
Wash and dry your sweatshirt before you embroider. This removes any sizing, dirt, or oils that could affect how the fabric handles thread or stabilizer.
Cotton and fleece materials tend to shrink slightly, so prewashing ensures your design won’t distort later. Use mild detergent and avoid fabric softeners, which can coat fibers.
After drying, press the sweatshirt lightly with an iron to smooth wrinkles. Work on a flat surface with good lighting.
Place a stabilizer behind the area where you’ll embroider—cut-away stabilizers work well for thicker fabrics like fleece. Use your embroidery hoop to secure the fabric evenly. The fabric should feel tight but not stretched.
A properly hooped sweatshirt keeps stitches neat and prevents bunching. When machine embroidering, make sure the area fits the hoop comfortably without pulling seams.
Transferring Designs to the Sweatshirt
Decide if you’ll hand-stitch or use an embroidery machine. For machine work, load your chosen design into your embroidery software to adjust size and placement.
You can mirror or rotate your pattern as needed to fit your sweatshirt style.
If you’re embroidering by hand, trace or transfer your pattern using your preferred method:
- Fabric marker for light-colored sweatshirts
- Iron-on transfer paper for more complex designs
- Water-soluble transfer sheets that rinse away after stitching
Test your marker or transfer method on a small hidden area to check for staining or bleed-through. Keep your lines thin so they’re easy to cover with thread later.
Take your time centering your design—once marked, it’s difficult to shift.
Placement Tips for Your Embroidery
Placement can make or break your final look. Measure from seams and edges rather than guessing.
For reference, many crafters use these common positions:
|
Embroidery Area |
Recommended Distance from Neckline or Seam |
|
Center Chest |
2–3 inches below neckline |
|
Left Chest |
4–6 inches from center front |
|
Sleeve Detail |
Centered along the outer arm seam |
Try taping paper templates of your designs onto the sweatshirt to visualize how they’ll appear when worn. Stand back and check alignment in a mirror or on a dress form.
Adjust as needed before hooping. Taking a few extra minutes here helps your finished embroidery look intentional and well-balanced.
Hand and Machine Embroidery Techniques

You can embroider a sweatshirt by hand or with a machine, depending on your tools and goals. Each approach uses different equipment and methods to create neat, lasting designs on thicker fabric.
Understanding thread types, hooping methods, and stitch basics helps you get better results with less frustration.
Hand Embroidery Basics and Starting Stitches
When embroidering by hand, begin by choosing the right embroidery needle and embroidery floss. Sweatshirt fabric is thicker than cotton, so use a sharp needle with a large eye.
Split the floss into fewer strands to reduce bulk and help stitches lie flat. Place your fabric in an embroidery hoop to keep it taut.
Start with simple, strong stitches like the backstitch, satin stitch, and chain stitch. These create outlines, fill shapes, and add texture.
Add small details using a French knot for dots or accents. Work slowly and keep your thread loose enough to move freely through the fabric.
Use short strands of floss to prevent tangling, and tie off the ends neatly on the inside of the sweatshirt.
Also read: 10 Basic Embroidery Stitches Every Crafter Must Know
Machine Embroidery Setup and Tips
With machine embroidery, the key to success is stabilizing the thick sweatshirt fabric. Use a medium or cutaway stabilizer under the design area.
Thread your embroidery machine with quality embroidery thread that matches your design colors and fabric weight. Select a needle made for knits or medium-weight material.
Load your design and test it on similar fabric first to check tension and density. If the thread breaks or puckers, adjust tension or slow down the stitching speed.
Keep the sweatshirt surface flat and smooth. Flatten seams or bulky areas under the hoop before stitching.
Clean your bobbin area and replace needles regularly to avoid skipped stitches or uneven stitching.
Hooping or Floating the Sweatshirt
Hooping a sweatshirt properly helps prevent puckering or stretching. For most designs, hoop both the stabilizer and sweatshirt fabric together.
Choose a hoop large enough to hold the design area tight but not over-stretched. If the fabric is too thick or uneven, try floating.
Hoop only the stabilizer and secure the sweatshirt on top using temporary adhesive spray or basting stitches. Floating is useful for sleeves, pockets, or seams that can’t fit inside the hoop.
Before stitching, smooth the fabric, and make sure the design is centered. Always check alignment by running a trace option on the machine to confirm the position before starting to embroider.
Adding Embellishments and Advanced Details
Once your main design is stitched, enhance it with embellishments. You can hand-sew beads, sequins, or small patches using matching thread.
Add extra texture with raised chain stitches or layered satin stitches around filled areas. If you combine hand and machine embroidery, use floss shades that complement your thread.
Outline bold machine sections with hand-done backstitching for contrast. Keep your sweatshirt soft by avoiding heavy stitching in one area.
Trim loose threads and press from the inside with a cloth over the design to protect it. Store finished sweatshirts flat to maintain their shape and embroidery quality.
Finishing Touches and Caring for Your Embroidered Sweatshirt

Finishing your design neatly, securing the stitches, and cleaning your sweatshirt correctly will help your embroidery hold up over time.
Simple steps like trimming threads carefully, checking that stitches stay secure, and washing the garment gently all make a big difference.
Trimming Threads and Stabilizer
After your last stitch, remove the sweatshirt from the hoop and inspect the design closely. Use small, sharp embroidery scissors to trim any extra threads on both the front and the back. Avoid pulling stray threads since this can loosen stitches.
Cut away excess stabilizer from the back of the fabric. For tear-away stabilizer, hold the fabric flat and tear gently around the edges of the design. If you used cut-away stabilizer, trim it to about ¼ inch past the stitching line.
If the inside of the sweatshirt feels rough, press a piece of soft fusible backing like Tender Touch over the reverse side.
This helps protect sensitive skin and gives your embroidered sweatshirt a professional finish. Always make sure the iron setting matches the sweatshirt fabric, such as cotton or fleece.
Ensuring Lasting Stitch Quality
To help your stitches last, press your finished sweatshirt carefully. Place a thin cloth between the iron and the embroidery to prevent flattening the threads. Use a low to medium heat setting and avoid steam directly on the design.
Check for loose stitches and snip any fuzz or lint stuck in the threads. If stitches pucker, you can stretch the fabric lightly while pressing to smooth it out.
|
Step |
Action |
|
1 |
Press gently with cloth over embroidery |
|
2 |
Avoid direct steam or moisture |
|
3 |
Store flat, not folded on the design |
|
4 |
Inspect and remove lint regularly |
Care Tips for Embroidered Garments
Wash your sweatshirt inside out in cold water on a gentle cycle to reduce friction. Avoid bleach or harsh detergents, which can fade both the fabric and thread.
For best results, air dry flat or tumble dry on low heat. High temperatures may cause the stitches or stabilizer to shrink. When ironing, keep the design face down on a towel and press from the back.
Store embroidered sweatshirts flat in a cool, dry place. If you hang them, use padded hangers to prevent stretching at the shoulders.
Wrap Up
Embroidering a sweatshirt adds a unique, personalized touch to casual wear. Start by selecting the right stabilizer to prevent fabric stretching and puckering. Use an embroidery hoop or adhesive stabilizer for better control and position your design carefully. Choose threads that contrast well with the sweatshirt color and practice stitching on scrap fabric first.
Whether hand or machine embroidery, patience and proper technique ensure vibrant, lasting designs. Ready to customize your sweatshirts? Explore Caydo embroidery kits for inspiring sweatshirt embroidery designs and quality supplies to get started with confidence!
Frequently Asked Questions
What type of thread is best for embroidering onto a sweatshirt fabric?
Use polyester or rayon embroidery thread for strong, colorfast results. Polyester works well because it handles frequent washing and stretching. Cotton thread can also be used if you want a matte finish, but it may fade or break down faster with wear.
Can you share some tips for stabilizing a sweatshirt before embroidering?
Place a cut-away stabilizer on the back of the fabric to prevent stretching and puckering during stitching. This type of stabilizer stays in place after embroidery, which helps maintain shape over time.
You can also add a layer of temporary adhesive spray to keep the stabilizer from shifting. For extra support, place a piece of water-soluble topping on the front if your sweatshirt has a thick or fuzzy surface.
How do I choose the right needle for embroidering a sweatshirt?
A ballpoint or stretch needle glides between knit fibers instead of piercing them. This helps prevent snags and holes in the fabric. For machine embroidery, use sizes 75/11 or 80/12, depending on the sweatshirt’s thickness and your thread weight.
Are there any patterns that work particularly well on sweatshirt material?
Simple, low-density designs with open stitches prevent the fabric from becoming stiff. Avoid very dense or heavily filled patterns, as they can weigh down the sweatshirt and cause curling around the design.
Line art, text, and light floral or geometric motifs are easy to manage and look great on thicker knits.
What's the best way to transfer an embroidery design onto a sweatshirt?
If you’re embroidering by hand, trace patterns with a washable fabric marker or iron-on transfer pen.
For machine embroidery, align the design using your hoop’s marking guides or a template printed from your software. Take time to center the design and mark positioning lines with chalk to help keep your embroidery straight.
How can I ensure my embroidered design remains intact after washing my sweatshirt?
Turn the sweatshirt inside out before washing to protect the stitches. Use cold water and mild detergent, and avoid bleach or harsh chemicals.
Air drying helps preserve the embroidery’s color and texture. If you must use a dryer, use a low heat setting.


