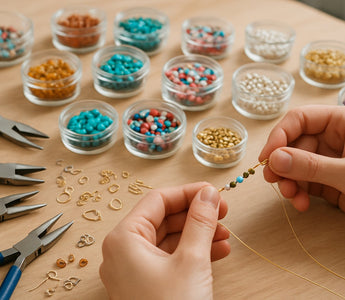
DIY jewelry making is a creative and enjoyable way to craft unique accessories at home. You can use simple materials like beads, thread, or even things you’ve already got lying around.
You’ll save money, personalize your style, and make thoughtful gifts once you learn a few beginner-friendly jewelry techniques. A lot of people find DIY jewelry making relaxing. It’s rewarding, and there are endless ways to design earrings, necklaces, bracelets, and more.
You don’t need fancy tools or much experience to start. Tons of easy tutorials online walk you through every step, from choosing supplies to using basic tools safely.
Making your own jewelry lets you get creative, join a friendly DIY community, and feel that little spark of pride when you wear something you made yourself.
DIY Jewelry Making: A Quick Start Guide

DIY jewelry making lets you turn simple tools and beads into unique accessories. You really don’t need much money or experience—just a few key items and a bit of creativity.
What Is DIY Jewelry Making And Why Try It?
DIY jewelry making means you create your own pieces—necklaces, bracelets, earrings—using tools and materials you pick out yourself. It’s popular because you can design things to match your style or make gifts for people you care about.
Making jewelry yourself lets you learn new skills and use your imagination. You’ll save money compared to buying store-made pieces.
Sites like Pinterest and YouTube have thousands of ideas and tutorials for beginners. With practice, jewelry making can become a relaxing and surprisingly satisfying hobby.
You can start with basic stringing or beading. Later, try more advanced things like wire wrapping. Every accessory you finish feels personal, and you can even reuse old jewelry parts for new designs.
Essential Tools And Materials For Beginners
When you start jewelry making, it helps to have a few basic tools. The most common are:
- Pliers (round-nose, chain-nose, flat-nose)
- Wire cutters
- Crimp beads and crimping pliers
A starter kit usually has all these. You’ll also want string or wire—nylon, elastic, or metal—for necklaces or bracelets.
Beads come in all kinds of materials: glass, plastic, wood, or even gemstones. Clasps, jump rings, and earring hooks help you finish your pieces. If you want to engrave or decorate metal, try a small file or engraving tool. With these supplies, you can make lots of beginner-friendly projects.
Take your diy jewelry making to the next level with the right tools. Explore the full range in the BeadArt accessories collection.
Step-By-Step DIY Jewelry Making Techniques

You can make beautiful jewelry at home with just a few tools and materials. Beads, wire, and string open up endless design possibilities, from simple bracelets to bold statement earrings.
1. Easy Beading, Wire Wrapping, And Knotting Basics

Round Bead Channel Beading Spinner G1
Gather up round-nose pliers, wire cutters, and flat-nose pliers. You’ll also need beads, wire, jump rings, and stringing cord.
Beading is just sliding beads onto flexible wire or string. Crimp beads help secure the ends and keep everything in place.
It’s much easier and faster to string beads using a bead spinner, which lets you load dozens of beads onto your wire or thread in seconds—perfect for speeding up your projects. For a reliable option, check out these bead spinners from Caydo:
Wire wrapping is another handy technique for making things like beaded rings or linking beads. You bend the wire to make loops or wrap it for strength. Try making a simple wrapped loop with pliers to join parts together.
Knotting, like macrame or pearl knotting, works well for bracelets and necklaces. For example, a lark’s head knot is great for starting rope necklaces or macrame bracelets. Add beads between knots for a bit of extra flair.
Colorful beads are the heart of diy jewelry making. Find your favorites in the bead collection.
2. Creative Project Ideas: Bracelets, Necklaces, Earrings
Try making a beaded bracelet by stringing colorful beads and adding a clasp at the end. Mix glass, gemstone, or lava stone beads for different textures and a little meaning.
Memory wire is perfect for bracelets because it keeps its shape and is easy to finish. For necklaces, rope statement styles use thick cords and big beads for a bold look.
Make a lava stone necklace by stringing natural lava stones—they even absorb essential oils for a soft scent.
Explore earrings by shaping thin wire into hoops and adding beads or charms. Want to make tassel or statement earrings? Attach fringe or layers to hoops or studs with jump rings.
Here’s a quick idea table:
|
Project |
Primary Materials |
Main Techniques |
|
Beaded Bracelet |
Beads, elastic/string, clasp |
Stringing, knotting |
|
Rope Necklace |
Rope/cord, large beads |
Macrame, beading |
|
Hoop Earrings |
Wire, beads |
Wire shaping, beading |
|
Tassel Earrings |
String/yarn, jump rings, hooks |
Knotting, attaching |
Design Tips And Troubleshooting
Making your own jewelry means you get to show off your style. With the right tools and a little know-how, you can avoid common mistakes and fix small problems as you go.
Bead spinners are a great tool for making stringing beads much faster and easier—especially if you’re working on bigger projects. For the best results, check out the quality bead spinners available at Caydo.
Choosing Colors, Personalizing, And Fixing Mistakes
Picking colors is a big part of jewelry making. Use the color wheel to find combos that work. Blue and gold? Classic. Mix bead shapes and throw in a gold chain or silver clasp for something eye-catching.
Personalizing is easy—use letter beads, initials, or a tag with your name. Custom charms or birthstones make your pieces even more special.
Common issues and how to fix them:
|
Problem |
Possible Cause |
Quick Fix |
|
Clasp won’t close |
Loose or bent ring/part |
Tighten or replace clasp |
|
Chain breaks |
Weak links |
Use higher-quality chain, repair with pliers |
|
Beads fall off |
Knot not tight, wire frays |
Double knot, use stronger stringing material |
If your necklace or bracelet starts coming apart, check for weak spots like broken links or frayed threads. Always test your finished jewelry gently before wearing it out and about.
DIY Jewelry For Kids, Teens, And Beginners

Bead Spinner Kit Pro - Clay Beads Pro
Making your own jewelry is a creative, hands-on way to show your style. You don’t need fancy materials or special skills to begin.
Safe, Fun, And Simple Projects Anyone Can Make
There are tons of easy DIY jewelry projects that use budget-friendly supplies like beads, craft sticks, string, and safety pins. Try a beaded daisy chain bracelet—just beads, string, and a needle. Or soak wooden craft sticks in water, bend, and decorate for colorful cuffs.
For kids, start with snap-together beads or simple friendship bracelets. Teens might like hoops, charms, or upcycling old jewelry into fresh designs. Beginners should pick projects with clear instructions and skip sharp tools.
Here’s a quick supply list for safe projects:
|
Material |
Why It’s Great |
|
Beads |
Colorful, easy to work with |
|
Craft Sticks |
Cheap, flexible, safe |
|
String/Yarn |
Soft, knot-friendly |
|
Safety Pins |
Simple to use, no tools |
|
Fabric Scraps |
Eco-friendly, unique look |
You can make gifts, try out new looks, or even sell your creations. Keep it simple and have fun experimenting.
Clean finishes make your diy jewelry making look pro. Learn more in The Best Thread Burner Tool for Your Crafting Projects.
Selling And Sharing Your DIY Jewelry

Wooden Bead Spinner Kit - Clay Beads
If you want to turn your handmade jewelry into income, you’ll need to reach the right buyers and stand out. The best online platforms and a bit of smart promotion can help you get noticed.
How To Sell Online And Promote Your Handmade Jewelry
Start by listing your jewelry on places like Etsy, eBay, and Amazon Handmade. Use clear, close-up photos and write simple, honest descriptions. Keywords like “handmade jewelry” or “beaded earrings” help people find your stuff.
Social media is a great tool for showing off your jewelry. Post on Instagram, Facebook, and Pinterest, and add hashtags like #handmadejewelry or #shophandmade. Tell a little story with each post—it helps you connect with shoppers.
Try offering bundles, deals, or free gift wrapping to attract buyers. Good customer service—like answering messages quickly—earns you positive reviews and repeat customers.
Final Thoughts
DIY jewelry making lets you turn your creative ideas into real, wearable art. You don’t need fancy tools—just some basic supplies and a little imagination. Each project you finish will boost your skills and give you something special to wear or share.
Whether you want to make gifts, start a new hobby, or even sell your creations, DIY jewelry making is a great way to have fun and express yourself. So grab your supplies and start making something beautiful today!
Want to make beautiful pieces at home? See how in the article, Create Stunning Jewelry with Caydo's Jewelry Making Kit.
Frequently Asked Questions
What is the easiest jewelry to start making?
Bracelets and simple beaded necklaces are the easiest to begin with. Stretchy bracelets use elastic cord and don’t need metalwork or advanced skills. Tons of online tutorials walk you through easy earrings too, especially with pre-made hooks and beads.
What do I need to make my own jewelry?
You’ll want to grab some basic tools like round nose pliers, chain nose pliers, and wire cutters. Materials such as jewelry wire, beads, clasps, and jump rings are perfect for beginners.
A design mat or even a small tray keeps your stuff from rolling away. If you’re thinking about metal jewelry, you might want to pick up a small hammer and some files too.
What DIY jewelry sells the most?
Beaded bracelets, resin pendants, and those minimalist wire-wrapped rings seem to fly off the shelves. Personalized pieces—think name necklaces or birthstone charms—are favorites on Etsy and at local craft fairs.
Honestly, if your designs feel unique or follow a trend, you’ll probably get more attention on social media and marketplaces. Sometimes it’s just about catching the right vibe at the right time.
Can you make money selling homemade jewelry?
Absolutely, you can make money selling homemade jewelry both online and in person. Lots of people start out on Etsy, at craft fairs, or even through their own Instagram pages.
Your success really comes down to your designs, how you price things, your photos, and, let’s be real, how much you’re willing to put yourself out there.
What cheap jewelry will not tarnish?
Stainless steel is budget-friendly and doesn’t really tarnish. Some gold-filled or gold-plated pieces hold up better than your average metal alloys, too.
Try to steer clear of lead, nickel, and cadmium. Not only do they tarnish fast, but they can also be rough on your skin.
What materials are best for starting to make metal jewelry?
If you're just getting into metal jewelry, copper and brass make great choices. They're soft, easy to shape, and honestly, they won't break the bank.
Sterling silver works well too if you're after a higher-quality finish. I'd steer clear of metals like nickel—those can cause health issues, and honestly, they're just not worth the hassle.
Stick with materials that are safe and simple to work with. You'll thank yourself later.


