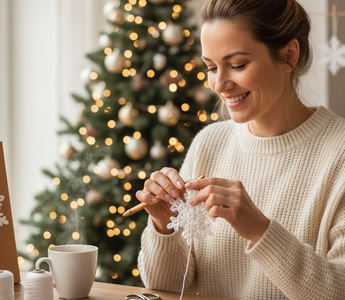
Winter is coming, and nothing says cozy like handmade decor. If you have ever admired those delicate, lace-like ornaments hanging on a tree, you might be surprised to learn that snowflake crochet is actually easier than it looks! You don't need to be an expert to turn simple thread into intricate, frosty masterpieces.
With just a hook, some patience, and the right technique, you can fill your home with a blizzard of unique beauty. Whether you want to deck the halls or create personalized gift toppers, this guide will break down the process into five simple, manageable steps to get you stitching like a pro. 🧶
Quick Summary:
- Materials Matter: Use cotton thread and a small steel hook for crisp definition.
- Core Technique: Start with a magic ring to create a tight center.
- The Secret Sauce: Blocking and stiffening are mandatory for that "frozen" look.
- Decor Idea: Use them as ornaments, window decals, or gift toppers.
Essential Tools for Success with Snowflake Crochet
Before you dive into the patterns, setting yourself up with the right materials is half the battle. Successful snowflake crochet relies on tension and the right fiber choice to ensure your flakes look sharp, not floppy.
Choosing the Right Yarn and Hook
While you can use standard yarn, the most professional-looking snowflakes are made with cotton crochet thread (size 10 is perfect for beginners). This provides the stiffness and definition needed for the points. You will also need a smaller hook than usual—typically a steel hook sized 1.5mm to 2.0mm.
- Cotton Thread: Provides crisp stitch definition.
- Steel Hooks: Essential for working with fine thread.
- Blocking Board: To pin your snowflake into shape.
Ready to stock up? Check out our Crochet Yarn Collection for high-quality cotton options, or grab a complete Crochet Set to get all your hooks in one go.
Embroidery Tools You May Shop
Explore More


The Ultimate Guide to Doing Snowflake Crochet in 5 Steps
Don't be intimidated by the intricate details. Every snowflake crochet pattern, no matter how complex, generally follows this logical progression. Master these steps, and you can tackle any design.
Step 1: Create the Center (The Magic Ring)

Most snowflakes start in a round. To avoid a gaping hole in the middle, start with a "magic ring" (or magic circle). This allows you to pull the center tight, creating a solid foundation for your six points.
Step 2: Build the Base Rounds

Work your first round into the magic ring. This usually involves groups of double crochets (dc) separated by chain spaces. This sets up the hexagonal symmetry required for a realistic six-pointed flake.
Step 3: Create the Spines

As you move outward, you will create "chains" that extend from the center. These chains act as the skeleton or spines of the snowflake, giving it that classic starry shape.
Step 4: The Picot Stitch (The "Frosty" Detail)

This is the secret ingredient! To get those sharp, pointy tips that make a snowflake look real, you will use the "picot stitch" (chain 3 or 4, then slip stitch back into the first chain). This creates the decorative nubs and points on the edges.
Step 5: Blocking and Stiffening (Crucial!)

When you finish stitching, your snowflake will look like a crumpled ball. Do not panic! You must "block" it. Dip the snowflake in a mixture of water and white glue (or commercial fabric stiffener), pin it out on a blocking board to stretch the points, and let it dry completely. This creates that hard, frozen structure.
✨Want to make it even easier?
If you are mass-producing snowflakes for a tree, consider using a Crocheting Machine for base cords, or grab one of our beginner-friendly Crochet Kits that come with everything you need.
Conclusion
Learning snowflake crochet is a rewarding way to bring the winter season indoors.
By mastering the magic ring, the picot stitch, and the art of blocking, you can transform simple cotton thread into heirloom-quality ornaments.
Remember, just like real snowflakes, no two handmade creations need to be exactly alike—imperfections just add to their charm.
So grab your coffee, find a cozy spot, and let it snow inside your crafting room! For more inspiration, explore our full range of fiber art supplies.
Related Articles
-
- How to Crochet - A comprehensive guide for absolute beginners.
- Is Crocheting Hard? - We debunk the myths about learning this fiber art.
- Micro Crocheting - Ready for a challenge? Learn about working with tiny threads.
- How to Crochet with Beads - Add sparkle to your snowflakes with this technique.
Frequently Asked Questions About Snowflake Crochet
What is the best stiffener for crochet snowflakes?
A simple DIY mixture of 50% white school glue and 50% water works perfectly. For a more natural option, you can use a heavy sugar-water solution (boiled and cooled), though glue tends to be more durable against humidity and pests.
Can I use regular yarn for snowflake crochet patterns?
You can, but the result will be much larger and "fuzzier." For that crisp, delicate, lace-like appearance, mercerized cotton thread (size 10) is the industry standard. If you want giant wall decor, chunky yarn works great!
Why do my snowflakes curl up?
Curling is normal immediately after stitching because the tension pulls the thread tight. This is exactly why blocking is mandatory. Pinning it flat while wet relaxes the fibers and sets the shape permanently.
How do I hang crochet snowflakes?
Once dried and stiffened, you can attach a simple loop of fishing line (for an invisible look) or a festive satin ribbon to one of the picot points. They look beautiful on Christmas trees or hung in windows.


