
Is your crochet yarn always too loose, too tight, or slipping out of place? You might think the problem is your hook, but it often comes down to how you hold the yarn.
The way you hold yarn when crocheting controls your tension, makes your stitches even, and helps you stay comfortable.
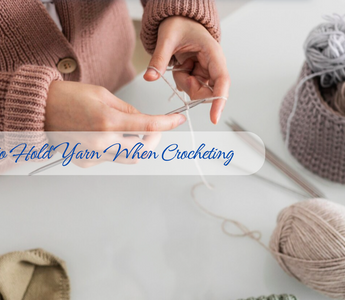
You use your non-dominant hand to guide the yarn and set the flow, while your hook hand focuses on making stitches. When you learn the right grip, your work feels smoother and your projects look more polished.
This guide shows you why your yarn hold matters, how to manage tension, and the most common ways to practice until it feels natural.
Quick Insights 🪡:
- There's No Single "Right" Way: The best method is the one that feels comfortable and gives you consistent tension.
- Tension is Key: How you hold the yarn directly controls how loose or tight your stitches are.
- Two Main Styles: Most holds are variations of either the Over the Finger style (for control) or the Palm Hold style (for speed).
- Prevent Fatigue: A proper, relaxed hold prevents hand cramps and allows for longer crochet sessions.
- Practice Makes Permanent: Muscle memory is everything. Give a new method a few hours to work before deciding if it's effective.
Why How You Hold Yarn When Crocheting Matters
The way you hold your yarn shapes how your stitches look, how long you can crochet without pain, and how quickly you move through a project. Small changes in grip and yarn flow can make the difference between uneven work and smooth, consistent results.
The Direct Link to Perfect Tension
Yarn tension controls the size and appearance of your stitches. If the yarn is too tight, your work will feel stiff and may even curl. If it is too loose, the fabric looks sloppy, and the stitches lose their shape.
Your non-dominant hand guides the working yarn while your dominant hand moves the hook. This balance creates even loops and maintains consistency in your project. Without steady tension, you will struggle to match stitch counts or follow patterns.
A good hold lets the yarn slide smoothly between your fingers. Many crocheters wrap the yarn around one or two fingers to adjust the tightness. Others pinch the yarn lightly without wrapping. The method matters less than finding a way that gives you steady, repeatable tension.
Preventing Hand Fatigue and Strain
Crocheting for long periods can cause cramping if you grip the yarn too tightly. Your hands and fingers should feel relaxed while still keeping control of the yarn. A stiff hold forces your muscles to work harder than necessary.
When you hold your yarn in a comfortable way, you reduce pressure on your wrist and fingers. This makes it easier to crochet for longer sessions without pain. Over time, this also lowers your risk of strain or repetitive stress injuries.
Simple adjustments help, such as:
- Letting the yarn glide instead of pulling hard
- Using your non-dominant hand for gentle control
- Checking your posture and hand position often
A relaxed grip is part of crochet basics that keeps you crafting without discomfort.
Increasing Your Speed and Efficiency
A smooth yarn flow means you spend less time stopping to adjust your grip. When your yarn slides easily through your fingers, your hook can keep moving without interruption. This makes your stitches more fluid and your projects faster to complete.
If you constantly pause to fix tension or untangle the working yarn, your pace slows down. A steady hold allows you to focus on the pattern instead of your yarn.
You can test your efficiency by noticing how often you stop mid-row. With practice, you will find a hold that allows your yarn to move at the right speed for you. This balance of comfort and control is what helps you crochet more quickly and with fewer mistakes.
🧶 Also Read: Learn Suzette Stitch Crochet Fast (Beginner Guide)
How to Control Yarn Tension

You control yarn tension by guiding the yarn through your fingers in a way that feels natural and steady. The method you choose affects how tight or loose your stitches look and how comfortable you feel while working.
Index Finger Wrap
With the index finger wrap, you guide the yarn over the top of your index finger. This lets you control the flow of yarn by moving your finger closer or farther from the hook.
You can raise your finger higher to loosen the tension or lower it to tighten the yarn. This minor adjustment helps you keep your stitches even.
Many beginners find this method simple because it only uses one finger to manage the yarn. It is also easy to change tension without stopping your work.
Quick tips:
- Keep your finger relaxed to avoid hand strain.
- Adjust finger height instead of pulling the yarn too hard.
- Practice slow movements until the yarn flows smoothly.
Pinky Loop Method or The Pinky Wrap (Most Common Method)
In this method, you loop the yarn once around your pinky and then bring it over your index finger. The pinky acts like a small anchor, giving you steady control over the yarn.
This style is popular because it strikes a balance between comfort and control. The pinky loop prevents the yarn from slipping too quickly, while the index finger continues to guide the flow.
You can adjust the tension by loosening or tightening it as needed, depending on how firmly the yarn rests around your pinky finger. If it feels too tight, relax your pinky slightly.
Steps to try:
- Wrap yarn around pinky once.
- Bring the yarn over the index finger.
- Guide the yarn with your index finger, while your pinky finger controls steadiness.
This method works well for most yarn types and helps create consistent stitches.
Over-the-Fingers Wrap
With this method, you spread the yarn across several fingers instead of just one or two. The yarn usually passes over the pinky, under the ring and middle fingers, and then over the index finger.
This wrap gives you more surface contact with the yarn, which spreads out the tension. It can feel more comfortable for longer projects since no single finger holds all the pressure.
You can adjust tension by slightly moving your middle or ring fingers. This makes it easier to fine-tune without stopping your work.
Benefits of this wrap:
- Reduces finger fatigue.
- Provides steady tension across multiple points.
- Works well for thicker yarns or when you want a relaxed stitch.
This style may take practice, but it offers a smooth and controlled yarn flow once you get used to it.
🧶 Also Read: How to Crochet a Wind Spinner: Step-by-Step Guide
Basic Ways to Hold Yarn When Crocheting

The way you hold your crochet hook and yarn affects your tension, stitch size, and comfort. Each grip offers a different level of control, so it's helpful to try them and see which one feels most natural in your hands.
Pencil Grip
With the pencil grip, you hold the crochet hook the same way you would hold a pencil. Your thumb and index finger pinch the hook while it rests against the side of your middle finger.
This grip often feels familiar if you are used to writing. It gives you fine control of the hook tip, which can help when working with smaller yarn or tighter stitches.
You may find this grip easier for delicate work, but it can sometimes make your hand feel tense during long sessions. To avoid strain, keep your hand relaxed and let your fingers guide the hook instead of squeezing too tightly.
Some crocheters prefer this grip when working with lace or detailed stitch patterns because it allows for precise movements.
Key points:
- Hook held like a pencil
- Good for control and detail
- Can cause hand fatigue if held too tight
Knife Grip
The knife grip holds the crochet hook like a dinner knife. Your thumb rests on top of the hook, and your fingers wrap around the handle.
This grip often feels steadier and stronger than the pencil grip. It is useful when working with thicker yarn or larger projects because it gives you more leverage.
Many beginners find this grip more natural because it requires less finger movement. The hand stays in a relaxed position, and the wrist does more of the guiding.
If you tend to crochet for long periods, this grip may reduce strain compared to the pencil grip. It allows you to move the hook with a simple wrist motion instead of relying on small finger movements.
Key points:
- Hook held like a knife
- Provides strong control and leverage
- Comfortable for long projects
Pencil Hold
The pencil hold refers to how you control the yarn with your non-dominant hand while using the pencil grip for the hook. You thread the yarn through your fingers so you can adjust the tension as you work.
A common method is to loop the yarn over your index finger and let the other fingers guide and release it. This keeps the yarn steady and prevents it from slipping too quickly.
The pencil hold works well if you prefer a light touch. It gives you fine control over tension, which helps create even stitches.
Experiment with how the yarn wraps around your fingers. Some crocheters prefer one loop, while others opt for two for added resistance.
Key points:
- Yarn runs over the index finger
- Works with a pencil grip, hook hold
- Good for even tension and small projects
Pen Hold
The pen hold is another way to manage yarn tension with your non-dominant hand. Instead of looping the yarn only over the index finger, you may weave it through multiple fingers, similar to how you might hold a pen for writing.
This method gives you more friction and control over the yarn. It is especially helpful with slippery fibers like silk or bamboo.
The pen hold can also help you crochet faster since the yarn stays in place and feeds smoothly through your fingers. You can adjust the tightness by changing how many fingers the yarn wraps around.
Some crocheters find this hold more secure than the pencil hold, especially when working on larger projects that require consistent tension.
Key points:
- Yarn weaves through several fingers
- Helps with slippery yarns
- Keeps tension steady for larger projects
🧶 Also Read: Top 15 Cool Crochet Stitches for Stylish Creations
Step-by-Step Guide to Holding Yarn
Start by letting the yarn rest in your non-dominant hand. This hand controls the yarn and helps you maintain the correct tension while crocheting. Your dominant hand will hold the hook.
Follow these steps to set up your yarn:
- Wrap the yarn around your pinky finger or under a couple of fingers. This adds gentle tension.
- Bring the yarn across the back of your hand to keep it in place.
- Drape the yarn over your index finger. This finger guides the yarn into each stitch.
- Adjust your grip until the yarn moves smoothly without snagging.
- Keep your hand relaxed to avoid straining your fingers or wrist.
You may need to try different wraps or finger positions until you find what feels natural. Some people loop the yarn once around the pinky, while others prefer sliding it under two fingers. Both ways can work as long as the yarn flows evenly.
Pay attention to how tight or loose the yarn feels. If it pulls too hard, loosen your wrap. If it feels too loose, add another finger for control. The goal is steady tension that makes your stitches even.
With practice, your hands will adjust and the yarn will move more easily. Over time, holding the yarn will become a natural and automatic action.
Common Mistakes Beginners Make
When you first learn to crochet, it is easy to form habits that make your stitches uneven or your hands sore. Paying attention to how you hold your yarn can help you avoid these problems.
Some common mistakes include:
- Holding yarn too tightly → stitches look stiff and hard to work into
- Holding yarn too loosely → tension becomes uneven and gaps appear
- Switching grips too often → harder to build consistent muscle memory
- Ignoring comfort → leads to hand cramps and fatigue
If you grip the yarn too tightly, your hook will not move smoothly. This makes crocheting slower and more tiring.
If you hold the yarn too loosely, your stitches may look messy. You will also struggle to keep the same size for each stitch.
Changing the way you hold yarn too often can confuse your hands. Practice one comfortable method until it feels natural before trying another.
Do not forget about comfort. If your hands ache, take breaks and adjust your grip. A relaxed hold helps you crochet longer and with more control.
Tips for Finding Your Best Grip
Finding the right way to hold yarn takes some trial and error. What feels natural for one person may not work for another, so it helps to test different methods.
You can try wrapping the yarn around one or two fingers to control tension. Some people loop it over the index finger, while others prefer weaving it between fingers. Small changes in wrapping can make the yarn flow more smoothly.
Simple tips to try:
- Experiment with different finger wraps.
- Adjust your hold if the yarn is thick or thin.
- Practice with short swatches before starting a big project.
- Use ergonomic hooks to prevent hand fatigue.
If your stitches feel too tight, loosen your grip or adjust the way the yarn passes through your fingers. If they feel too loose, add another wrap or adjust finger placement.
Working with small test pieces helps you notice what feels comfortable. Over time, you will find a grip that strikes a balance between control and ease.
Choosing the right hook also makes a difference. Ergonomic handles can reduce strain, especially during long sessions. This helps you crochet longer without discomfort.
Conclusion
Finding your perfect yarn-holding technique for crocheting is a personal journey that pays off in more beautiful projects and pain-free hands.
We've explored the main styles, from the controlled Pinky Wrap to the speedy Palm Hold, and outlined how to troubleshoot common issues, such as tension and fatigue.
Remember, the ultimate goal is comfort and consistency. Don't be afraid to experiment until you find your sweet spot.
Now, cozy up with some yarn and practice your new hold!
Ready to practice with the perfect yarn? Explore our collections to find your next project's match:
FAQs About How to Hold Yarn When Crocheting
You can adjust how you hold your yarn to match your comfort, hand strength, and project needs. Small changes in grip or tension make a big difference in stitch quality and ease of crocheting.
What’s the best way to hold yarn for beginners?
Start with a simple hold that feels natural. Wrap the yarn over your index finger on your non-dominant hand, and let it rest against your other fingers for light control. Keep your grip loose so the yarn flows smoothly.
How can I maintain consistent yarn tension?
Guide the yarn through your fingers the same way every time. Avoid pulling too tightly, but don’t let it slip freely either. Practice short rows to find a steady rhythm that keeps your stitches even.
How to hold crochet yarn with arthritis?
Choose a relaxed grip that reduces strain. You may want to wrap the yarn less tightly or use support tools like ergonomic hooks. Take breaks often, and focus on comfort rather than speed.
How to hold yarn when crocheting a wooble?
Woobles use small, tight stitches, so steady tension matters. Hold the yarn firmly enough to keep stitches close, but not so tight that the hook struggles to pull through. Adjust your finger placement until the yarn moves smoothly.
Is there a wrong way to hold a crochet hook?
There isn’t a single correct way, but some grips may cause strain or uneven stitches. Most people use either the pencil grip or the knife grip. Try both and see which one feels more natural for your hand.


