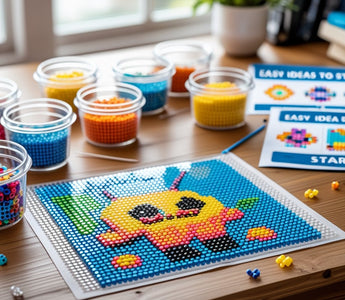
Fuse beads pixel art is the perfect craft for anyone looking to create colorful, retro-inspired designs. Whether you're a beginner or experienced crafter, these tiny beads let you bring pixelated artwork to life in just minutes.
The best part? You don't need any special skills to get started. Simply arrange beads on a pegboard following a pattern, iron them together, and watch your creation come alive. From cute decorations to personalized gifts, the possibilities are endless.
Ready to dive in? We've gathered easy fuse beads pixel art ideas you can start making today. Let's explore simple projects that will have you hooked on this addictive craft!
Want to start creating your own pixel art? Browse our fuse beads kits that include beads, pegboards, ironing paper, and patterns—everything you need to begin crafting today.
Fruit Fuse Beads Pixel Art

Fruit designs are perfect for fuse bead beginners. They use bold colors and easy shapes. Think apples, strawberries, pineapples, and watermelons—nothing too fussy, but they still look cute when you’re done.
Easy Fruit Designs for Beginners
Strawberries are a classic starting point. You just need red and green beads. Arrange them in a triangle with a green leafy top—about 20-30 beads in all. Toss in a few white or yellow beads for seeds if you want extra detail.
Apples are even simpler. Grab red beads for the body, brown for a little stem, and one green bead for a leaf. The round shape uses maybe 25-35 beads total.
Watermelon slices are great for practicing color blocks. Make a half-circle of pink or red for the fruit, add a white line for the rind, and finish with dark green outside. Scatter a few black beads as seeds. It’s a nice way to play with color without overthinking it.
Cherries? Just two small red circles and brown stems—about 15-20 beads per cherry. Bananas are even easier: yellow beads in a crescent, brown at the tips, and you’re done.
Fruit Magnets and Keychains
Once you finish your fruit, it’s easy to turn them into keychains or magnets. For keychains, iron both sides so they’re sturdy. Pop a jump ring through an edge bead and add a keychain clasp. Done.
For magnets, you only need to iron one side. Glue a small magnet to the back with craft or hot glue. Let it dry before tossing it on the fridge.
Mix and match fruits on a single keychain for a little variety. Make a handful of small fruits (1-2 inches each) and clip them all to the same ring. It works especially well with cherries, strawberries, and apple slices.
If you’re worried about fading, spray on a clear sealant after ironing. Just wait a day before sealing your keychains or magnets so everything’s set.
Framed Fuse Beads Pixel Art

Framing your fuse bead art turns it into legit wall decor. You can go for small, single pieces or group a few together. Or, if you’re feeling bold, tackle a bigger project that really stands out.
Small Frame Designs
Small frames fit 4x4 or 5x5 inch fuse bead designs—perfect for standard craft store frames and most pegboards.
Popular small frame subjects:
- Game icons (hearts, coins, power-ups)
- Mini animals or snacks
- Alphabet letters
- Emoji faces
- Simple geometric shapes
Hang a bunch of small frames in a grid for a gallery wall vibe. You don’t need complicated designs, and each one only takes about 15–30 minutes. Great for quick wins.
Shadow box frames add a bit of depth so your beads don’t get squished. Regular frames work too—just make sure the bead thickness fits without pressing on the glass.
Large Statement Pieces
If you want something bigger, connect multiple pegboards or plan out your design on a big square grid. Projects 8x10 inches or more really pop in a room.
Some ideas for large designs:
- Character portraits from games or shows
- Simple landscape scenes
- Quotes with decorative borders
- Colorful, complex patterns
You’ll need more beads—an 8x10 inch piece takes maybe 500–800. Pick your colors before you start and work in sections so you don’t get lost.
Mount big pieces on foam board or cardboard before framing. It keeps them from sagging. Go for frames with solid backing and sturdy hardware if your art is heavy.
Want to turn any image into a fuse bead pattern? Our projector drawing toys make it simple to trace and plan your designs before placing a single bead.
Christmas Holiday Fuse Beads Pixel Art

Christmas designs are a natural fit for fuse beads. Holiday shapes are simple, the colors are bright, and you can whip up decorations, gifts, or ornaments without much fuss.
Classic Holiday Icons
Christmas trees are super easy on a 7×9 grid. Use dark green for the tree, brown for the trunk, and a yellow bead for a star at the top. The symmetry makes it easy—just build one side and mirror it.
Gift boxes work on a 6×6 grid. Pick one color for the box, a contrasting ribbon down the center, and a bow on top (just four beads). These are quick, so you can make a bunch at once.
Candy canes need only red and white beads in diagonal stripes. Start with a curved hook, alternate colors, and you’re set. Make them tiny or a little bigger, whatever you prefer.
Ornaments and Tree Decorations
Round ornaments fit a 10×10 grid. Fill the middle with a solid color or try stripes or dots. Add a small cap at the top in silver or gold, and a line of beads for the hanging loop.
You can turn bead art into tree ornaments by adding string loops before or after ironing. Thread a ribbon through a top bead, or glue a jump ring on the back. Snowflakes look especially nice as ornaments—they hang well and the symmetry stands out.
Stick magnetic strips on the back of smaller designs for fridge decorations. Star shapes in yellow or gold make awesome tree toppers if you scale them up to a 15×15 grid or bigger.
If you love the pixelated style of fuse beads, you'll enjoy diamond painting too! Explore our diamond painting tools for another satisfying craft that creates sparkling, colorful artwork.
Conclusion: Pixel Art Ideas
Fuse beads pixel art is an easy, fun way to create colorful designs in minutes. Whether you're making fruit magnets, framed wall art, or festive Christmas decorations, these projects are perfect for crafters of all skill levels. All you need is a kit, a pattern, and a little creativity to get started.
The best part? Once you finish one project, you'll want to make another. These addictive little beads turn simple ideas into tangible art you can display, gift, or wear.
Ready for more creative project ideas? Check out our guide on indoor activities for kids for even more inspiration!
Frequently Asked Questions: Pixel Art Ideas
People usually have a lot of questions about fuse beads—what tools to use, how to actually fuse the beads, and how to keep everything together. Here are some of the things folks ask most often:
How to make pixel art beads?
Pick a simple pattern like hearts, stars, or video game characters if you're new to this. Place each bead on your pegboard following the pattern, working row by row to avoid mistakes. You can use printed patterns, sketch your own on graph paper, or find ideas online.
How to make fuse beads?
Cover your completed design with ironing paper to protect the beads and iron. Set your iron to medium heat with no steam, then press gently in circles for 10–30 seconds until beads melt together. Let it cool, lift it off the pegboard, and iron the back if you want both sides flat. Check out our complete fuse beads kits that include everything you need—beads, pegboards, ironing paper, and patterns—so you can start creating right away.
Can you use a regular iron for fuse beads?
Yes, any regular household iron works perfectly fine. Turn off the steam function before starting, as steam can cause beads to bubble and melt unevenly. Use medium heat only—too hot will melt beads too fast and ruin your design.
Which glue is best for sticking beads?
You don't need glue for fuse bead projects since ironing melts and bonds them permanently. White craft glue or clear adhesive only works for non-ironing projects, but it takes longer and creates weaker bonds. Ironing fuses the plastic together for a much sturdier finished piece.


