Knitting starts with a single move—the knit stitch. It’s really the foundation for almost every project, whether you’re making a scarf or a sweater.
Learning how to knit stitch gives you the basic skill you need to create endless patterns and textures. Once you get this motion down, you can build on it and try more complex designs.
The right tools, yarn, and tension all come together to form even, comfortable stitches. When you practice the knit stitch, you gain control over your needles and yarn.
This sets you up for success as you start casting on, fixing mistakes, and jumping into new projects. This guide breaks down each step so you can feel confident from the start.
Whether you’re picking up needles for the first time or coming back after a break, you’ll find what you need to start knitting with ease.
What Is a Knit Stitch?

A knit stitch is the basic building block of knitting. You use it to create the texture and structure of most knitted fabrics.
It makes a smooth surface on one side and a bumpy texture on the other. Simple, right?
Knit Stitch in Knitting Patterns
Knitting patterns usually abbreviate knit stitch as “k” or “K.” If you see k10, that just means knit 10 stitches in a row.
Patterns use these abbreviations to keep things short and easy to follow. You make a knit stitch by pushing the right needle through the front of a loop on the left needle, wrapping the yarn around, and pulling a new loop through.
Each new stitch replaces the old one on your right needle. When you knit every row, you create a garter stitch fabric.
Garter stitch is stretchy, lies flat, and looks the same on both sides. If you alternate rows of knit and purl stitches, you get stockinette stitch—smooth on the front, textured on the back.
|
Abbreviation |
Meaning |
Resulting Texture |
|
k or K |
Knit stitch |
Smooth front, bumpy back |
|
p or P |
Purl stitch |
Bumpy front, smooth back |
Knit Stitch vs. Purl Stitch
The purl stitch is basically the reverse of the knit stitch. You insert your needle from back to front instead of front to back.
This small change flips the texture, making the opposite side of the fabric. Knit and purl stitches work together to form almost every knitting pattern you’ll see.
When you use only knit stitches, you get ridges. Mix in purl stitches and you can make ribbing, seed stitch, or stockinette.
Think of them as partners: the knit stitch pushes loops forward, while the purl stitch pulls them back. By combining them, you decide how your fabric looks and feels—smooth, stretchy, or textured.
Check out The Best Yarn Winders for Crocheters and Knitters to make managing your yarn easier while practicing knit stitches.
Essential Materials and Tools

You only need a few basic items to knit smoothly and learn good technique. The right yarn, needles, and a bit of yarn control make each stitch easier.
Choosing Yarn and Needles
Start with medium-weight yarn (worsted weight) because it’s easy to see your stitches. A light color helps you spot mistakes quickly.
Stay away from fuzzy or textured yarns at first—they hide the loops and make it hard to fix errors. Knitting needles come in metal, wood, and plastic.
Most beginners like wood or bamboo because they grip the yarn a bit, helping you control your tension. Metal needles let the yarn slide more, which is nice once you’re more confident.
Try US size 8 (5 mm) needles with worsted yarn for practice projects. Straight needles work well for learning, but circular needles are fine if you like shorter, lighter tools.
Keep both needles balanced and comfortable in your hands so you don’t strain yourself.
|
Yarn Weight |
Suggested Needle Size |
Best For |
|
Light (DK) |
US 5–7 (3.75–4.5 mm) |
Small accessories |
|
Medium (Worsted) |
US 7–9 (4.5–5.5 mm) |
Practice swatches, scarves |
|
Bulky |
US 9–11 (5.5–8 mm) |
Quick, thick projects |
Working Yarn Basics
Your working yarn is the strand connected to the yarn ball. It feeds into your stitches as you knit.
Pull from the center of the yarn ball if you can. That helps prevent tangles and keeps the yarn flowing evenly.
Hold the working yarn in your right hand for the English method, or in your left hand for the Continental method. Try both and see which one feels better.
Keep the yarn relaxed but not too loose—steady tension helps your stitches look even. If the yarn catches or tightens, pause and adjust your grip.
Wrap the yarn once or twice around a finger to control flow. Over time, you’ll find a rhythm where your yarn glides across the right-hand needle and loops neatly onto the left-hand needle.
For added convenience, try the Automatic Knitting Machine Collection — great for speeding up repetitive stitches.
Casting On: Starting Your Project

Before you knit, you need to get loops of yarn onto your needle. This is called casting on, and it forms the base row for your stitches.
The method you pick affects how stretchy, firm, or decorative your edge looks. There are a few ways to cast on, and each one feels a little different.
Different Casting On Methods
The knitted cast on is great for beginners. It uses the same motion as a knit stitch, so you learn two things at once.
It makes a flexible edge that works for most projects. The long-tail cast on gives a neat, slightly stretchy edge.
You’ll have to guess how much yarn to leave for the tail, but once you get it, it’s fast and smooth. The cable cast on makes a firm, stable edge that’s good for button bands or textured patterns.
It looks tidy and holds its shape. Try each one and see what you like best.
|
Method |
Edge Type |
Best For |
|
Knitted Cast On |
Soft, flexible |
Beginners, general projects |
|
Long-Tail Cast On |
Neat, stretchy |
Hats, scarves, socks |
|
Cable Cast On |
Firm, stable |
Sweaters, borders |
Tips for a Neat Cast On
Keep your tension even as you cast on. If your loops are too tight, it’s tough to knit the first row.
Too loose, and the edge might look sloppy. Use both hands to control the yarn and needle placement.
Try to move smoothly and don’t tug the yarn. Count your stitches often so you don’t make mistakes.
If you lose track, recount before you start knitting. For a cleaner edge, make sure all stitches sit flat and face the same way.
You can also use a larger needle to cast on if you tend to knit tightly. Practice on scrap yarn until your cast on feels consistent and even.
Organize your tools with the Craft Wire Collection — perfect for structured or decorative knitting add-ons.
Step-by-Step: How to Knit Stitch

You’ll learn how to hold your needles and yarn, make your first knit stitch, and keep going across a row with even tension. Each step helps you build confidence as you practice this basic skill.
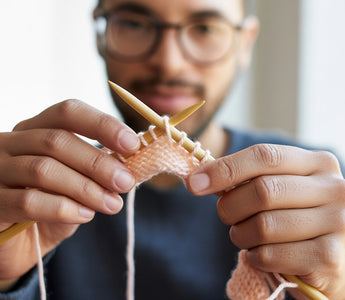
Holding the Needles and Yarn
Hold the left-hand needle with the cast-on stitches in your left hand. Grip it lightly so the stitches can move along the needle.
Hold the right-hand needle in your right hand, kind of like a pencil or chopstick. Let the working yarn—the strand connected to the yarn ball—rest over your right index finger.
This helps you control tension. Keep a small loop of yarn ready so it moves smoothly as you knit.
If you knit in the English (throwing) style, wrap the yarn around your right hand and move it with your fingers. In the Continental (picking) style, hold the yarn in your left hand and catch it with the needle tip.
Try both and see which one feels more natural. Good posture and relaxed hands help prevent strain.
Keep your shoulders loose and wrists straight. Adjust your grip until the yarn flows easily without slipping or getting too tight.
Making the First Knit Stitch
Push the right-hand needle into the first stitch on the left-hand needle from front to back. The right needle should cross behind the left one, forming an “X.”
Wrap the working yarn around the tip of the right needle from back to front. Use your index finger to guide the yarn smoothly.
This new loop becomes your new stitch. Pull the right-hand needle and the yarn loop through the stitch on the left-hand needle.
Now you’ve got a new loop on the right needle. Slide the old stitch off the left-hand needle carefully.
Keep the new stitch snug but not too tight. Repeat this for the next stitch, keeping your movements steady and even.
Completing a Row of Knit Stitches
Keep knitting each stitch across the left-hand needle until you’ve worked them all. The right-hand needle will now hold all your new knit stitches.
To start the next row, switch hands so the needle with the stitches is now in your left hand. This keeps your fabric growing evenly.
Watch your working yarn to keep your tension even. If the stitches look too loose or tight, just adjust your grip a bit.
After a few rows, you’ll see a textured fabric called garter stitch, made entirely of knit stitches. It feels stretchy and lies flat, which is perfect for scarves, dishcloths, and other beginner projects.
Read our article, Knitting vs. Crochet: Which Craft Is Right for You?, to explore how knitting stitches compare to crochet techniques.
Common Mistakes and Troubleshooting

Small knitting mistakes can really mess with how your project looks and feels. Dropped stitches, uneven tension, and extra or missing stitches are the usual troublemakers, so keep an eye out for those.
Fixing Dropped Stitches
A dropped stitch happens when a loop slips off your needle and starts to unravel down the row. If you catch it early, fixing it is way easier.
Grab a crochet hook or just use your knitting needle to pull the loose loop back up through each stitch above it. Keep going until it reaches the row you're working on, and make sure the loop faces the same way as the other stitches.
If your dropped stitch has unraveled a few rows, lay your work flat. Pin the loose loop with a safety pin or stitch marker while you work it back up. Double-check your stitch count after to make sure nothing’s off.
Adjusting Tension
Uneven tension can make your knitting look bumpy or way too tight. If your stitches feel stiff, you might be yanking the yarn too hard. Let your hands relax and let the yarn slide more easily.
If things look loose or your stitches are all over the place, try wrapping the yarn around your fingers one extra time for a bit more control. Knit a small swatch and compare your stitches per inch to what your pattern says, just to see where you're at.
Try switching to a different needle size if you still can’t get it right. Bigger needles make looser stitches, smaller ones make them tighter. Honestly, just keep your posture comfy and your hands steady—it gets easier with practice.
Avoiding Extra or Missing Stitches
Extra or missing stitches usually sneak in when you knit into the wrong loop or miss one at the edge. Count your stitches at the end of each row so you’ll spot mistakes before they get out of hand.
Watch out for yarn overs, which can add stitches if you’re not careful. Unless your pattern tells you to do one, keep the yarn behind your needles when you switch between knit and purl.
To avoid missing stitches, check that the first and last loops on your needle look right before you turn your work. Drop in some stitch markers every 10 or 20 stitches if you want an easier way to keep track of your rows and repeats.
Start with high-quality yarns from the Crochet Yarn Collection for smooth, even stitches.
Final Thoughts
Learning how to knit stitch is the foundation of all knitting projects. The basic knit stitch creates a smooth, flexible fabric that’s perfect for scarves, blankets, and sweaters.
Once you understand how to hold your yarn and needles, the repetitive motion becomes relaxing and rewarding. Mastering this stitch opens the door to endless creative possibilities.
Make your first knit stitches soft and smooth with Caydo crochet and knitting yarn, ideal for beginners!
Explore our guide, 15+ Quick Knitting Projects for Weekend Crafting Fun, to apply your new stitch skills to simple, satisfying projects.
Frequently Asked Questions
What's the easiest way to start a basic knit stitch for beginners?
Start by casting on about 10 to 20 stitches. Hold the needle with your stitches in your left hand and the empty needle in your right.
Push the right needle through the first stitch, wrap the yarn around it, pull a new loop through, and slide the old stitch off. That’s really all there is to it.
Can you share some tips for keeping my knitting tension even?
Keep your hands relaxed and hold the yarn steady. Try wrapping the yarn the same way around your fingers every time.
If your stitches look too tight, loosen up a bit. If they’re too loose, just pull the yarn a little more as you knit. Honestly, it takes some trial and error.
What do I do if I drop a stitch while knitting?
Grab a crochet hook or your knitting needle and pick up the dropped loop. Pull the working yarn through each missed strand until the stitch is back up to your current row.
If it unraveled a few rows, work slowly, one loop at a time. It’s not the end of the world—just go slow and you’ll get it back.
How do I choose the right type of yarn for my knitting project?
Match your yarn weight to your pattern and needle size. If you’re just starting, go for a smooth, medium-weight yarn—it’s way easier to see what you’re doing.
Stay away from fuzzy or slippery yarns until you get the hang of things. They look cool, but they’re not beginner-friendly.
Could you explain the difference between the knit and purl stitch?
The knit stitch makes smooth “V” shapes on the front of your fabric. The purl stitch gives you little bumps instead.
If you switch between knit and purl rows, you can make all kinds of textures, like stockinette or ribbing. Pretty much every knitting pattern is built from these two stitches, so once you know them, you’re set.
What's the best way to cast off my knitting project to finish neatly?
Knit two stitches. Lift the first stitch over the second and off the needle. Knit one more stitch and repeat the lift. Keep going until you have just one stitch left.
Cut the yarn. Pull it through the last loop and tug it gently to secure your edge.


