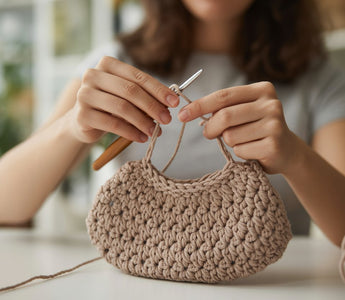
Crocheting a bag is a great way to make something useful and personal. It doesn’t matter if you want a sturdy tote, a soft shoulder bag, or a small clutch—the basics are easy to pick up.
You can crochet a bag by picking a style, grabbing the right yarn and hook, and using a few simple stitches to build a strong, practical shape.
Picking a design that fits your needs is the first step. You’ll also want to choose materials that last and use techniques that give your bag some structure.
As you go, you’ll see how yarn, stitches, and little details change the final look. Every step builds your confidence and teaches you something new.
Start strong with the Crochet Yarn Collection — offering durable yarns perfect for tote and shoulder bags.
Choosing a Crochet Bag Style

The style you pick shapes how you’ll use your bag and how long it’ll last. Shape, structure, and even the stitches you pick will all impact the end result.
Granny Square Bags
Granny square bags use small, colorful crochet squares joined together for the bag’s body. You can mix colors for a bold look or keep it simple and clean.
These bags have a handmade, vintage vibe that stands out. Use cotton or acrylic yarn so your bag holds its shape.
Lining the inside with fabric keeps your stuff from poking through the holes. Here’s a basic layout:
|
Part |
Description |
|
Squares |
9–16 small granny squares |
|
Handles |
Crochet or leather straps |
|
Lining |
Optional cotton or canvas |
Granny square bags are best for casual use, carrying small items, or just as a fun accessory.
Crochet Tote Bags
Crochet tote bags are bigger and sturdier, perfect for shopping or daily stuff. They usually use easy stitches like single or half-double crochet, which makes the fabric strong and even.
Cotton yarn is a good choice here because it keeps its shape and is easy to wash. You can make the base tighter or add a fabric insert for extra support.
If you want to customize, just change the height or width, or add pockets for more organization. Handles can be crocheted right onto the bag or attached with metal rings.
Tip: Go for neutral colors like beige, gray, or navy if you want a tote that works with anything.
Drawstring and Pouch Bags
Drawstring and pouch bags are small and quick to make. They close with a cord or ribbon, so your stuff stays put.
These little bags are great for holding accessories, makeup, or crochet tools. Use lightweight yarn like cotton or bamboo for a soft but sturdy finish.
You can add stripes or special stitches for fun. To make the drawstring, thread a chain through eyelets near the top and pull the ends to close it up.
They’re good practice for shaping and finishing, and you don’t have to commit to a big project.
Explore Crochet Materials and Supplies Every Crocheters Should Have to make sure you’re fully prepared before starting your next crochet bag project.
Selecting Materials and Tools

Picking the right supplies helps your bag keep its shape and last longer. Yarn weight, hook size, and little extras all change how your bag turns out.
Yarn Types and Colors
Choose yarn that fits how you’ll use the bag. Cotton yarn is best for structure and strength. It doesn’t stretch much and keeps the bag’s shape.
Acrylic yarn is light, easy to wash, and cheap, but it might stretch out over time. Blended yarns give you a mix of strength and softness.
If you want a fast project, try medium-weight (category 4) or bulky yarn (category 5–6). These make a thicker, stronger bag. Lighter yarns (category 3) create a softer, more flexible bag—good for small purses or pretty pieces.
Color matters too. Light shades show off your stitches, while dark colors hide dirt. If you’re just starting, pick a smooth, solid color so you can see your stitches. Fuzzy or textured yarn can wait until you’re more comfortable.
|
Yarn Type |
Best For |
Notes |
|
Cotton |
Structured totes |
Strong, holds shape |
|
Acrylic |
Everyday bags |
Soft, stretches slightly |
|
Blends |
All-purpose bags |
Balance of strength and feel |
Crochet Hook Sizes

8PCS Crochet Hooks Pink Gift Bag
Your hook size changes the bag’s texture and firmness. A smaller hook makes tight, sturdy stitches. A larger hook gives you a looser, softer fabric.
For medium-weight yarn, try a 4.5 mm to 5.5 mm hook. Test your hook and yarn together before you start. Crochet a small swatch to check how it feels.
If the fabric feels stiff or tough, go up a hook size. If it’s too loose or floppy, pick a smaller hook. Keep a few nearby in case you need to change things up.
Bag Hardware and Accessories
Little extras make your bag stronger and easier to use. Handles, zippers, buttons, and magnetic snaps all add something.
Try to match your hardware to your yarn—light metal or wood for cotton, plastic or fabric for softer yarns. Add liners to stop stretching and protect the inside.
You can sew a fabric lining by hand or machine. D-rings and strap clips let you add adjustable straps or take them off if you want.
Keep these tools handy:
- Scissors for trimming
- Darning needle for weaving in ends
- Measuring tape for checking size
These details help your bag look neat and last longer.
Add structure with the Aluminum Craft Wire Collection to shape handles or bag frames.
Essential Crochet Techniques for Bags
Strong, tidy stitches and solid joins make your bag tough and good-looking. You’ll use a few main techniques to shape the fabric, join pieces, and attach handles that won’t stretch out.
Basic Stitches Used in Bag Patterns
You’ll use simple stitches for a firm texture. The main ones are:
|
Stitch |
Abbreviation |
Description |
|
Single Crochet |
sc |
Tight, dense stitch for structure |
|
Half Double Crochet |
hdc |
Taller, adds flexibility |
|
Double Crochet |
dc |
Looser, good for patterns |
Use single crochet for sturdy bases and sides. Half double crochet helps you move smoothly between panels. Double crochet adds height and texture, perfect for stripes or openwork.
If you’re making granny squares, keep your tension even so all the squares match in size. Block your squares before joining to keep edges straight. For a tighter bag, use a smaller hook than normal for your yarn.
Joining Motifs and Panels
Lots of bag designs use panels or motifs that you need to join together. Use a slip stitch seam for a flat look or a whip stitch for a little ridge.
When you join granny squares, line up the corners and go through both loops for strength. Use matching yarn to hide seams or pick a contrast color for a border.
For bigger bags, crochet panels together as you go with a join-as-you-go method. It saves time and makes seams less bulky. Always weave in ends tightly—loose tails can make joins weak.
Adding Handles and Straps
Handles finish your bag and need to hold weight. Crochet them right onto the bag or make them separate and sew them on.
For totes, chain handles reinforced with rows of single crochet work well. For thicker straps, crochet a flat strip with half double crochet and fold it before sewing.
If you want adjustable or removable straps, attach metal rings or D-rings and thread the strap through. Add extra stitches or small crochet patches to reinforce where you attach them so they don’t stretch out or tear.
Check out Crochet Blanket Sizes and How Much Yarn You Really Need to help you plan the perfect amount of yarn for your bag.
Step-by-Step Guide: How to Crochet a Bag

You’ll start your bag by making a strong base. Then you’ll build up the body with even stitches and finish by shaping and joining everything together.
Making the Foundation Chain
Pick a crochet bag pattern that fits your skill level. Most patterns start with a foundation chain to set the width of your bag’s base.
Use medium-weight yarn and the hook size that matches the yarn label. Make a slip knot and chain the number of stitches the pattern says.
Keep your tension even. If it’s too tight, the base will curl. Too loose, and it’ll stretch out.
After your chain, add one extra for turning. Work single crochet stitches into each chain across. This row gives you a solid edge for the rest of the bag.
Some patterns have you work into the back loop only to help the base lie flat. Count your stitches at the end of the row to make sure you’re on track.
Crocheting the Bag Body
After you finish the base, you’ll start building the bag body. Most patterns use simple stitches like single crochet or half double crochet to make the bag sturdy.
If you’re working in the round, join the last stitch to the first with a slip stitch. Chain one to begin the next round.
This way, you skip seams and the bag looks smooth. It’s a neat trick, honestly.
You can mix up your stitches to add texture or a cool design. Try a granny stitch for something decorative, or stick with tight stitches for a solid feel.
Keep an eye on your stitch count as you go. Skipping stitches or uneven tension might make the sides slant, which is annoying.
Stop when you reach the height you want for your bag. Trust your gut here, and hold it up to check if it looks right.
Shaping and Assembling the Bag
To shape the top, you can decrease stitches for a tapered look. Or just keep the same stitch count for a boxy vibe.
Stitch markers help you track decreases around the bag. I lose mine all the time, but they’re worth it.
For handles, crochet straps separately or make them right from the top edge. Go over the stitches twice to make them stronger.
If you want a lining, sew it in after you’re done crocheting. Use a yarn needle to weave in all the loose ends.
Block your bag by lightly dampening and shaping it. Let it dry flat so it keeps its form.
Personalize your bag with charms from the Earring Making Kit Collection.
Finishing Touches and Customization

Small details can really make your crochet bag stand out. Line it for extra strength, add a zipper or button, or toss on some fun embellishments that show off your style.
Adding Linings and Closures
A lining helps keep your bag’s shape and stops stuff from poking through. Pick cotton fabric or canvas for something sturdy.
Cut the fabric a bit smaller than your bag, fold the edges, and sew it inside with a needle and thread. It’s not as hard as it sounds.
To add a zipper, pin it along the top and sew it by hand or with a sewing machine. If that feels tricky, try magnetic snaps or wooden buttons instead.
|
Closure Type |
Skill Level |
Notes |
|
Zipper |
Intermediate |
Best for secure closure |
|
Magnetic Snap |
Beginner |
Quick and neat |
|
Button Loop |
Beginner |
Adds a handmade look |
Press the lining flat before sewing so it doesn’t wrinkle. Make sure your closure opens and closes easily before you finish up.
Personalizing with Embellishments
Embellishments make your bag special. Crochet a few flowers, add tassels, or sew on some beads—just keep them light so they don’t weigh the bag down.
Here are a few easy ideas:
- Crochet appliqués like hearts or leaves
- Fabric patches for a pop of color
- Embroidery with cotton thread for texture
Use matching or contrasting yarn to sew decorations on tight. Try to space them out so your bag looks balanced.
If you like things simple, just add a single charm or a leather tag. Sometimes less really is more.
Read our article, Scrap Yarn Crochet Projects To Bust Your Stash, to discover creative ways to design your own crochet bag using leftover yarn.
Final Thoughts
Crocheting a bag is a fun and rewarding project that lets you create something both stylish and practical. You can use your handmade bag for everyday outings, shopping, or as a thoughtful handmade gift.
With just a few basic stitches and your favorite yarn, you’ll have a beautiful crochet bag ready in no time — perfect for beginners and experienced crocheters alike!
Craft your own unique, durable bag with Caydo crochet and knitting yarn! for a flawless finish every time!
Frequently Asked Questions
What materials do I need to start crocheting my own bag?
You’ll need yarn, a crochet hook that matches your yarn, scissors, and a yarn needle to weave in ends. Grab a stitch marker to keep track of rounds.
If you want to add a lining or handles, have fabric, thread, and a sewing needle ready too.
Can you suggest some easy patterns for beginners to crochet a bag?
Try a simple tote, market bag, or small pouch. These use basic stitches like single crochet or half double crochet.
Flat panels or round bases are easy to put together and help you learn shaping without getting too fancy.
How long does it typically take to crochet a bag?
A small bag might take a few hours. Bigger totes can take a few days.
Your speed depends on the stitch, bag size, and how much time you spend each day. No need to rush—enjoy the process.
What's the best type of yarn for a durable crocheted bag?
Cotton yarn is a solid pick because it keeps its shape and doesn’t stretch much. You can also try nylon or blended yarns for extra toughness.
Skip soft, stretchy yarns—they tend to sag when you fill the bag.
Are there any tricks to ensure my crocheted bag holds its shape?
Use tight stitches and a smaller hook to make the fabric firm. Adding a reinforced base or lining helps a lot.
Blocking your finished bag can also smooth and shape it. It’s worth the extra step.
How can I add a lining to my crocheted bag for extra strength?
First, grab some fabric that's a bit smaller than your bag. Fold the edges over so they look neat.
Pick something sturdy—cotton canvas or denim works great. Sew the lining inside the bag, either by hand or with a sewing machine.
This way, your bag holds its shape better and nothing pokes through. It's a small step, but it really makes your bag last longer.


